Squash is a versatile and healthy vegetable that can enhance the flavour of and variety to your meals, and growing your own squash in your vegetable garden has various advantages in addition to being delicious. You have complete control over the growing circumstances, can verify that the squash is free of pesticides and chemicals, and can experience the satisfaction of cultivating your own food.
Here, we’ll look at the many advantages of growing your own squash and provide you a step-by-step guidance on how to do it successfully. We’ll cover all you need to know to grow tasty, healthy squash in your garden, from selecting the correct squash variety to planting and harvesting. Whether you’re an expert gardener or just getting started, you’ll discover useful tips and practices to grow the best squash possible.
A Brief History
Squash has been a staple food of Native Americans for centuries, who were the first to cultivate it and share their knowledge with the colonists of the New World.
Squash, beans and corn were known as the “Three Sisters” and comprised a trinity of crops grown together by many Native American tribes. It was an essential part of their diet providing essential nutrients, particularly during the winter months when other foods were scarce.
Naturally occurring varieties of squash are believed to have originated from Mexico, Central America or South America in prehistoric times, and its use spread around the world due to its versatility and nutritional benefits. It is now a popular vegetable in many countries, with numerous varieties available for home gardeners to grow.
Nutritional Benefits
Squash is a highly nutritious vegetable, rich in a variety of vitamins and minerals.
One of the most important nutritional benefits of squash is its high vitamin C content. This essential nutrient aids in immune system stimulation, skin health, and wound healing. Other vitamins found in squash include vitamin A, which is necessary for eye health, and vitamin K, which promotes bone health.
Squash is high in nutrients as well as vitamins. It is abundant in potassium, which helps to control blood pressure and promotes heart health. Squash is particularly high in magnesium, a mineral that is essential for bone health and energy production.
Another important advantage of squash is its high fibre content. Squash is high in both soluble and insoluble fibre, which promotes good digestion and keeps you feeling full and satisfied. Consuming fiber-rich foods can also help to lower the risk of chronic diseases such as heart disease, diabetes, and certain types of cancer.
Also, because squash is a low-calorie vegetable, it is an ideal choice for people attempting to reduce or maintain a healthy weight. It is also a versatile vegetable that may be prepared in a variety of ways, such as sautéed, roasted, or blended into a soup. Squash is a must-have in any healthy diet due to its numerous nutritional benefits and great taste.
No matter which variety you are growing or eating, squash is an excellent source of nutrition that can help you maintain a healthy diet. To get the most out of your squash harvest, it’s important to choose varieties carefully and give them the right care.
Common Varieties & Their Uses
When it comes to squash varieties, there is a wide range of choices.
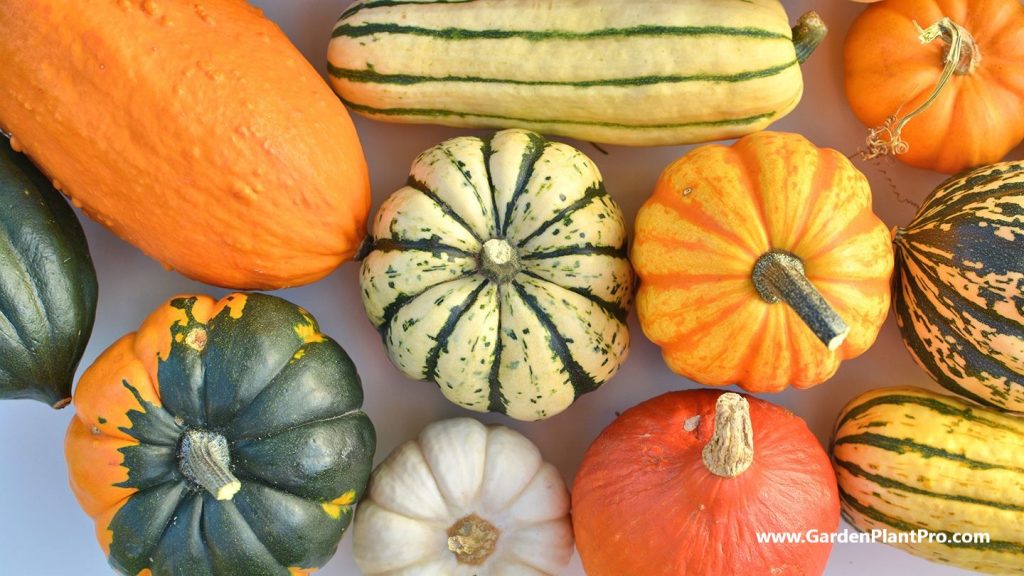
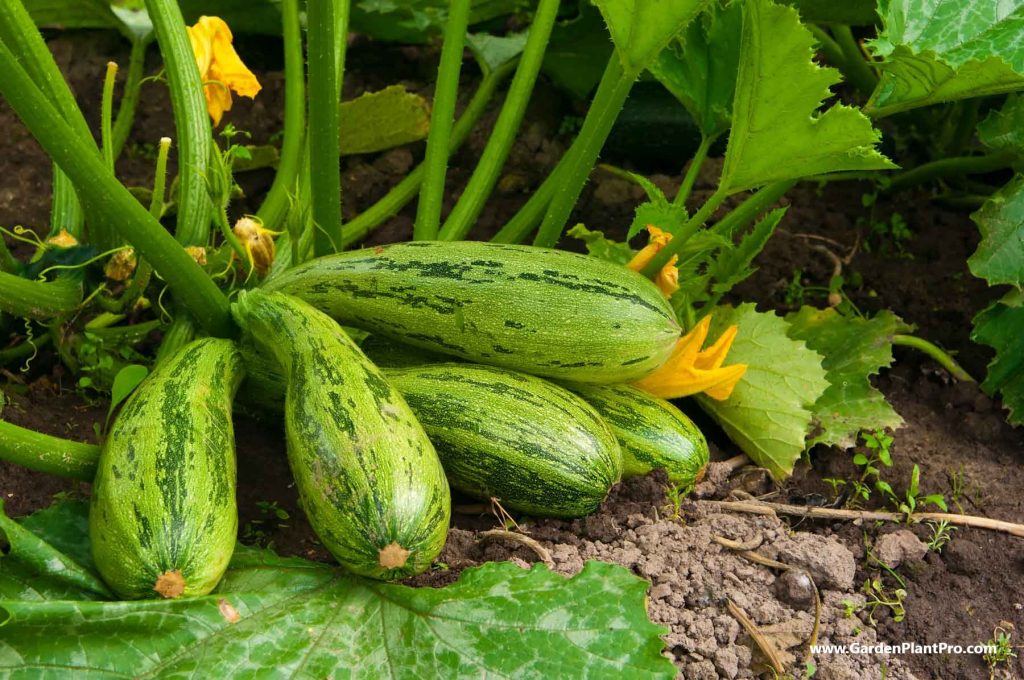
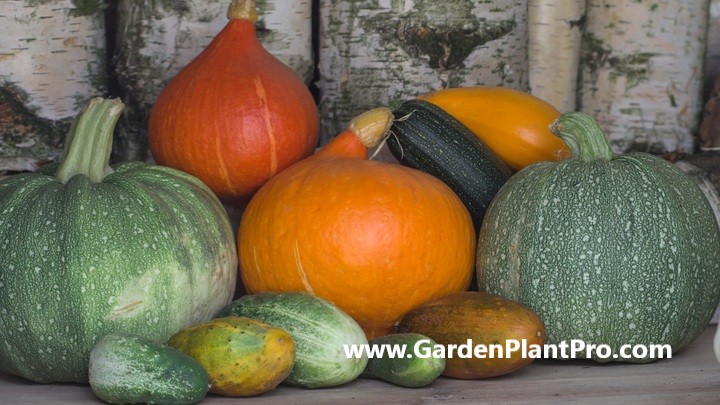
Summer squash are harvested when immature and their skin is edible, while winter squash varieties are harvested when the skin has hardened and their seeds can be saved for next year’s planting. Popular summer squash varieties include zucchini, yellow crookneck, pattypan, and scallopini. Common winter squash varieties include butternut, Hubbard, acorn, and pumpkin.
Summer squash are usually eaten raw or cooked quickly as they do not keep well; they can also be stuffed, steamed, sautéed, grilled, or roasted. Winter squash can be cooked in a variety of ways such as baking, roasting, steaming or sautéing. Pumpkin is often used in pies and soups while butternut can be used in soups, stews or pureed for a side dish. Acorn squash can be cut into wedges and baked with butter and brown sugar or stuffed with grains for a main dish.
When sowing squash directly into the ground, it is important to choose the right variety for your location and season as well as ensure that any danger of frost has ended before sowing seeds. Planting in a location with full sun and lots of space for sprawling vines will ensure the best results.
Preparing the soil by adding compost or aged manure will help create nutrient-rich soil to encourage healthy plant growth. It is also important to water and fertilize your plants regularly to ensure that they stay healthy and productive throughout the season. Finally, when it comes time to harvest your squash make sure to do so at the peak of ripeness for the best flavor and texture.
When To Sow
When it comes to sowing squash, timing is key. In temperate climates, the warmer months are the best time to sow seeds, while in tropical zones, squash can be grown all year round but it’s best to sow during the cooler months. It’s also possible to start seeds indoors 3–4 weeks prior to the planting date. Planting in peat pots is recommended, and two seeds can be planted in each position. Once the seedlings emerge, thin them out and leave the strongest seedling in each position.
For summer squashes, 50–65 frost free days are required for them to mature, so they can be planted in the last week or two of spring. Winter squashes require 90–120 days of frost free weather before they can be harvested, so they should be sowed at least four weeks before your last frost date. Be sure to also check the variety you want to grow as different varieties may need more or less time to mature.
Choosing A Suitable Location In The Garden
When choosing a suitable location for growing squash in a garden, it is important to select a spot with full sun and well-drained soil.
Squash plants need at least eight hours of direct sunlight per day. Good drainage is also important as the roots of squash plants may rot if they sit in water-logged soil for too long.
DIY PROJECT: Collect rainwater no matter where you live...
This DIY project is the best way to legally collect rainwater NO MATTER where you live. Get chlorine-free water, cut down on your water bills, and have enough for an emergency situation or to water your garden. Read More Here...
Before planting, the soil should be enriched with organic matter such as compost or aged manure. This will help to improve the drainage and provide essential nutrients to the plants. It is also important to consider nearby obstacles such as large trees which may cast shade on the area and impair the growth of the squash plants.
It is also important to remember that squash plants need plenty of room to grow, so it is advisable to leave enough space between each plant when planting. If planting multiple varieties of squash, remember that different varieties may cross-pollinate, so it is best to keep them separated.
Finally, it is important to remember that many types of squash are climbing plants and require support as they grow, so it is important to position them near a fence or trellis for support.
Preparing The Soil
Preparing the soil is an essential step in growing squash.
The most important factor when preparing the soil is choosing a location with full sun and well-drained soil. The soil should also be slightly acidic, with a pH range of 6.0 to 6.8. If your soil is too acidic, you can add lime according to the instructions on your product.
Once you have selected a suitable spot for your squash plants, you should dig a hole about a spade’s depth, width and height and fill it with a mixture of home-made compost or well-rotted manure and soil. This will improve the fertility of the soil and ensure that your squash plants get all the nutrients they need to thrive. Sprinkle the soil lightly with Yates Thrive Natural Blood & Bone before planting to give your squash an additional boost of nutrients.
Planting The Seeds Or Seedlings
Planting the seeds or seedlings is key to growing healthy squash.
Direct seeding is the most popular method for sowing squash, and it is best done after the last frost date. Begin by forming small mounds of soil and spacing them 70cm apart. Then, sow 3-4 seeds into each mound and water them well. As the seedlings grow, thin to the two strongest plants in each mound. Seeds should be planted 1/2 to 1 inch deep and spaced 12 to 18 inches apart, as squash plants can become quite large. Germination usually occurs within 7 days.
For those who prefer to use seedlings, they should be planted in a similar manner – in warm months in temperate climates or all year round in tropical zones. Plant two seedlings per position with 12-18 inches of space between them. Water deeply after planting and add a layer of mulch around the base of each plant to help retain moisture levels.
Be sure to harden off your young plants prior to planting them in the garden. This involves slowly introducing them to outdoor conditions over a period of several days in order to reduce shock and minimize transplant stress. Once hardened off, you can transplant your squash plants into the garden.
Once planted, care for your squash seedlings by keeping them free from weeds and pests, providing adequate water and fertilizer when necessary, and controlling any diseases that may arise. You can also look into companion planting with beneficial plants such as marigolds or nasturtiums to provide natural pest control. With proper care, your squash will be ready for harvest in 8-10 weeks.
Caring For The Seedlings
Once your squash seeds have germinated, it is important to care for the seedlings.
Provide them with full sun and water regularly. Make sure the soil stays moist but not soggy while they are growing. If necessary, use a plastic tarp or shade cloth to provide shade in the hottest part of the day.
Fertilize your squash plants with a balanced fertilizer every two to four weeks throughout the growing season. If you want to use organic fertilizer, compost or aged manure will work best.
Thin out the seedlings once they are about 4 inches tall, leaving two plants per mound or pot. This will give them more room to grow and will prevent overcrowding.
Once planted, water your squash plants deeply and mulch around them with straw or grass clippings to help retain moisture and suppress weeds. Weeds can compete with your squash plants for nutrients and water, so it is important to keep them under control throughout the season.
Watering & Fertilizing
Watering and fertilizing your squash plants is an important part of successful gardening.
Do you have some charcoal in your house right now? We call charcoal a “miracle leftover” for anyone who wants to be a little more self-sufficient and cut costs. That’s because it can help you with so many different things around the house and garden. You can even use it to make an energy-free fridge. Read More Here...
Squash plants are heavy feeders and require a moist soil and regular applications of fertilizer. When watering squash plants, focus a slow stream of water at the base of the plant; the water pressure should be slow enough not to erode any of the soil around the plant. Water them deeply once or twice a week when they’re actively growing and flowering.
A balanced fertilizer, such as 4-4-4, should be applied every two weeks. An organic fertilizer, such as Sustane Fertilizer, is a great choice for creating a sustainable garden. To get the most benefit from this fertilizer, apply it six to eight inches away from the plant along each side in what is known as side-dressing. This is especially important on light sandy soils.
When & How To Harvest
Harvesting squash is a simple but important task for successful cultivators.
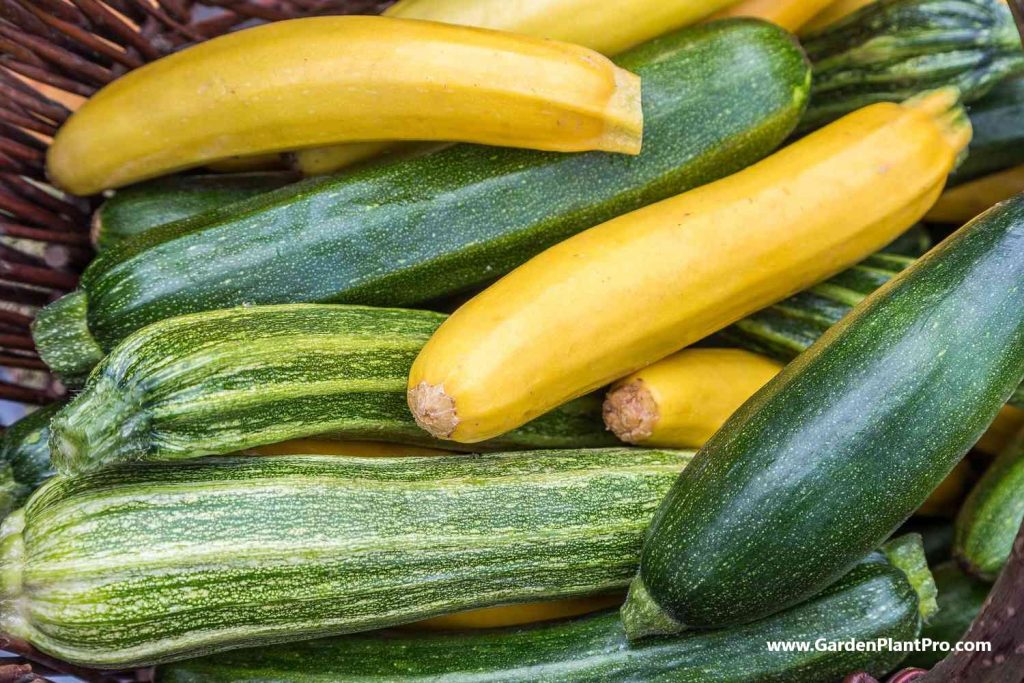
Depending on the variety, squash can be harvested when their fruits are small and tasty, or when they are larger and more mature. Summer squash, such as zucchini, should be harvested when the fruits are still young and tender. Winter squashes should be left to mature on the vine until their rinds are hard and can’t be easily pierced with a fingernail.
To ensure optimal flavor, check your squash plants often during the growing season. When ready to harvest, use a sharp knife or pruning shears to cut the fruit away from the vine. For summer squash, fruits should be harvested every few days to prevent them from becoming too large and seedy. For winter squashes, wait until the vines have died back before harvesting.
Once harvested, take care to handle your squash gently. Bruising or cutting these delicate fruits can lead to spoilage and reduce their shelf life. After harvest, store them in a cool, dry place away from direct sunlight for up to two weeks if you plan to eat them soon. If you don’t plan to eat them soon, winter squashes can last for several months if stored in a cool place like a cellar or basement.
Storing & Preserving
Storing squash properly is essential for extending its shelf life and keeping it fresh.
Generally, winter squash will last for 6 months or more if stored correctly. Summer squash, however, should be eaten within a week or two of harvesting.
If storage space is limited, freezing raw or cooked pumpkin and squash is an option. It will keep for up to a year when frozen. Raw pumpkin and squash can also be diced and freeze, or blanched before freezing to extend its shelf life.
Winter squash should be stored at temperatures between 50 and 55°F; every 18°F reduction in temperature will double the time it can be stored. Squash should not be exposed to direct sunlight, but kept in a cool, dark place such as a basement, cellar or garage.
When storing summer squash, it is best to leave the stems attached, as this helps to keep the moisture inside the fruit. Summer squash can be stored at room temperature for up to a week. If you want to store them longer, wrap them in plastic and refrigerate them.
For optimal storage conditions, it is best to keep winter and summer squash separately from each other. The ideal humidity for storing both types of squash is between 50-60%. The packaging should also be breathable to allow air circulation without being too porous and allowing too much moisture in.
To further ensure your home grown squash remains fresh and edible for as long as possible, regularly check on your stored produce and discard any that are soft or have visible signs of decay or mold growth.
Common Diseases & How To Control Them
Squash plants can be affected by various diseases, including fungal and bacterial, as well as viral infections. It’s important to be aware of the symptoms and to take steps to treat or prevent them.
Here are some of the most common diseases, and how to control them.
Powdery Mildew:
This is a fungal disease that appears as a white, powdery coating on the leaves and stems of squash plants. To control it, remove any affected leaves, avoid overhead watering and increase air circulation around the plant by thinning out overcrowded foliage. Treat with an approved fungicide according to the instructions on the label.
Downy Mildew:
This is a fungal disease that causes yellow spots on the leaves of squash plants. The spots may become white in color and may eventually turn brown or black. To control it, remove any affected leaves, avoid overhead watering and increase air circulation around the plant by thinning out overcrowded foliage. Treat with an approved fungicide according to the instructions on the label.
CASE STUDY: We've been living off the grid for the last 40 years...
In all that time an electric wire has never been connected to our house. We haven’t gotten or paid an electricity bill in over 40 years, but we have all the electricity we want. We grow everything we need, here, in our small backyard. We also have a small medicinal garden for tough times. Read More Here...
Bacterial Wilt:
This is a bacterial disease that causes wilting and yellowing of squash leaves. It is spread by cucumber beetles, so controlling these pests is an important step in managing this disease. Also, rotate crops each year to help reduce the risk of infection from this bacteria.
Viral Diseases:
Squash plants can also be infected with a variety of viruses, including squash mosaic virus (SMV), cucumber mosaic virus (CMV) and watermelon mosaic virus (WMV). These viruses can be spread by insects such as aphids and whiteflies, so keeping these pests under control can help reduce the risk of infection from viruses. If you suspect your plant has been infected with a virus, remove it immediately to help prevent further spread of the virus.
Common Pests & How To Control Them
Squash plants can be susceptible to a range of pests, such as squash bugs and cucumber beetles. These pests can cause damage to the plant and reduce yields. However, by following a few simple steps, you can protect your squash plants from these pests and ensure a healthy harvest.
The first step is to identify the pests.
Squash bugs are small brown insects that feed on the leaves of squash plants, while cucumber beetles are brightly colored and feed on the flowers and fruits of the plant.
Once you’ve identified the pest, it’s important to take action quickly.
Removing nymphs and adults by hand is an effective way to control their numbers. Alternatively, using companion planting with beneficial plants such as marigolds or nasturtiums can help deter the pests from attacking your squash plants.
An Integrated Pest Management (IPM) approach is also recommended for controlling squash bugs and cucumber beetles. This strategy includes planting early varieties of squash that are less attractive to pest species, as well as planting resistant varieties or varieties that have been bred specifically for pest control.
Cultivating the soil around your squash plants will also help to deter pests by removing hiding places they may use to hide. Finally, using row covers or fabric screens can help keep pests away from your crops. By following these tips, you can protect your squash plants from common pests and ensure a healthy harvest this season.
Beneficial Companion Plants
Beneficial companion plants are an important part of growing squash, as they can help to keep pests away, improve soil conditions, and encourage faster growth. Some of the best companion plants for squash include beans, corn, radishes, peas, pumpkin, marigolds and nasturtiums.
When planting squash, it is best to choose the early spring varieties and sow them alongside other vegetables like beans and corn. This classic combination benefits all three plants. Another great plant to grow alongside squash is dill as it attracts beneficial insects like pollinators and predators.
Before planting companion plants with your squash it is important to consider the type of soil you have and how much sun exposure the area gets. If there are any existing weeds in the area it is important to remove them before planting your chosen companion plants. It is also important to ensure that your chosen companion plants will not take away from the nutrients needed by your squash plants.
When planting cabbage-family crops such as squash, do not plant them near onions or garlic as these can interfere with their growth and flavor. Instead, plant them next to their good neighbors such as beans, corn, peas and pumpkin for optimal growth conditions.
Once all the companion plants are planted in the same location with your squash, ensure they get enough water and sunlight as this will encourage their healthy growth. Depending on what type of companion plants you have chosen they will require different fertilizers and care so make sure to research this before planting them. Finally, keep an eye out for pests and diseases that may affect your companion plants as these can spread to your squash crop if not taken care of in time.
Using Your Home Grown Squash
Once your squash is ready to be harvested, you can enjoy the fruits of your labor!
Whether you are harvesting zucchini, acorn squash, or another variety, each type has its own unique flavor and texture. Zucchinis can be eaten raw in salads or cooked in stir-fries and soups. Acorn squash can be baked and stuffed with savory fillings or made into a sweet side dish.
Squash can also be roasted and added to pastas, pizzas, and tacos for a delicious meal.
Preserving your home grown squash is also an option. Squash can be blanched, frozen, canned, or dried. Blanching involves briefly boiling the squash to kill bacteria before freezing it.
Canned squash is a great option for longer-term storage and requires slicing the squash into pieces before placing it in jars and submerging in boiling water.
Dried squash is best for adding flavor to dishes such as stews, soups, and casseroles. To make dried squash, simply cut it into thin slices, spread on a baking sheet, and bake in the oven at a low temperature until dry.
No matter how you choose to use your home grown squash, it’s sure to add flavor and nutrition to your meals.


