Garlic is a versatile and flavorful ingredient that can be used in a variety of dishes. Growing is at home is a great way to have a constant supply of fresh garlic and to enjoy the experience of growing your own food. Growing garlic is easy and can be done in a small garden or even in pots on a windowsill. In this guide, we will look at how to grow garlic at home, including the best soil type, how to plant garlic bulbs, how to care for your garlic plants, and when to harvest your garlic. With a little patience and care, you can grow a bountiful crop of garlic in no time.
A Brief History
Garlic has been cultivated and used in cooking for thousands of years. It is thought to have originated in Central Asia, and it has been used by cultures around the world since ancient times.
In early Chinese medicine, garlic was used to treat a variety of ailments, including parasite infestations and infections. In ancient Rome, it was a popular addition to food, and it is still used today in many cuisines across the globe.
Garlic has also been associated with many superstitions and folklore over the centuries. In some cultures, it was believed that garlic could ward off evil spirits or protect against curses. In Europe during the Middle Ages, it was widely believed that garlic could protect against vampires and werewolves.
In modern times, garlic is valued for its culinary properties as well as its medicinal benefits. Studies have suggested that garlic can help to reduce the risk of developing certain types of cancers and cardiovascular diseases. It has also been found to have antibacterial, anti-fungal, anti-viral and anti-inflammatory properties.
Garlic is easy to grow at home, making it a great addition to any vegetable garden. With proper care, you can enjoy a bountiful harvest of this versatile veggie each season.
Nutritional Benefits
Garlic is a powerhouse of nutrition and has many health benefits.
It contains a compound called allicin, which is responsible for its pungent smell and taste. Allicin is what gives garlic its anti-bacterial, anti-oxidant, and anti-fungal properties. In addition, garlic contains vitamins and minerals such as potassium, calcium, manganese and iron as well as sugar.
The health benefits of garlic are numerous. Regular consumption of garlic can help lower heart disease risk, lower blood pressure, prevent Alzheimer’s and dementia, improve digestive health and boost immunity. Garlic also has anti-inflammatory properties which can help reduce pain due to arthritis or other forms of inflammation in the body.
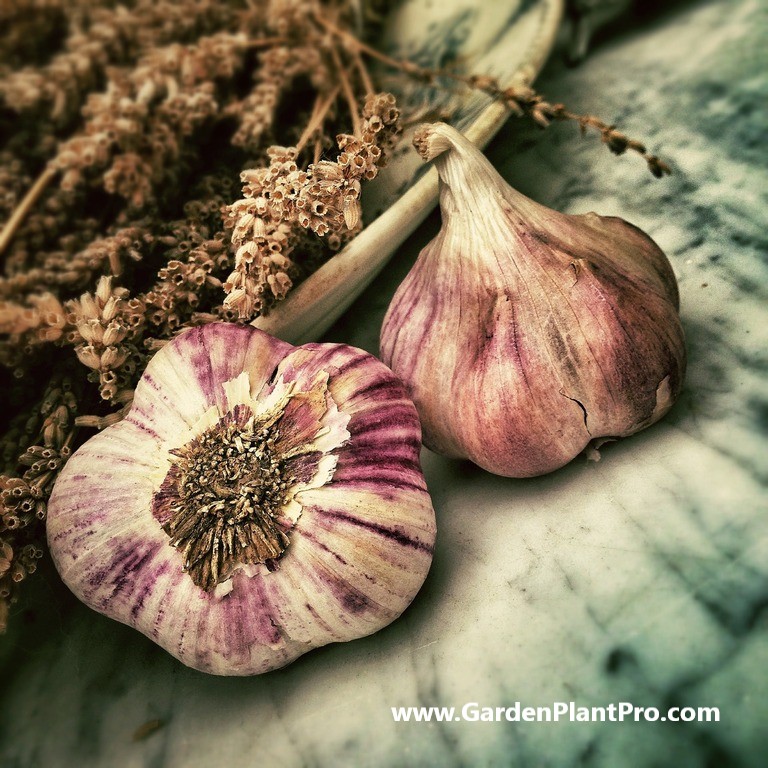
Common Varieties & Their Uses
Garlic is a versatile and widely used ingredient in many cuisines around the world. It has a distinct flavor that can be used to enhance dishes. There are many varieties of garlic available, each with their own unique flavor profile, so it’s important to choose the right variety for the dish you’re making.
Softneck garlic is the most common type of garlic found in grocery stores. This variety has a milder flavor than other varieties, making it suitable for those who don’t like strong garlic flavors. It also stores longer than other types of garlic, up to nine months if stored properly. Softneck garlic is typically used raw or cooked in dishes such as stir-fries, soups, and stews.
Hardneck garlic is also known as “top-setting” garlic and has a strong, spicy flavor. This variety is slightly more difficult to grow than softneck garlic but produces larger cloves with higher levels of nutrients and antioxidants. Hardneck garlic may be roasted or used raw in salsas and marinades.
Elephant garlic is actually not a true garlic but rather an edible type of leek. It has a mild flavor that is popular with those who don’t like strong garlicky flavors. It’s perhaps best known for its huge cloves which are much larger than regular garlic cloves. Elephant garlic can be eaten raw or cooked in any dish that calls for regular garlic.
When choosing a variety of garlic, consider what you will use it for and how long you need it to last. Softneck varieties are better for long-term storage while hardnecks are better for short-term storage and have a stronger flavor. Elephant garlic is best suited for those who don’t like strong garlicky flavors and want something milder.
When To Sow
Sowing garlic is best done in late autumn or early spring, when the weather starts to warm up and the soil has had time to settle from any harsh winter conditions. The ideal temperature for sowing is between 5-15°C. It’s important to ensure that there is no risk of frost during the period when you are sowing, as this can damage the cloves.
When sowing, it’s important to space your cloves correctly in order for them to grow properly and mature correctly. If you’re planting in a 15cm wide pot, sow three cloves, and if you’re planting in a 30cm pot sow six cloves. Space them diagonally, at 10-20cm spacings, with the pointy end of the clove facing upwards. Bury or press the individual seed cloves into the soil so they are 5cm deep.
Once planted, you should be able to see garlic shoots within 4 weeks and should start feeding your garlic when you see strong spring growth using a high-nitrogen fertilizer. With patience and proper care, you should be able to harvest your garlic around 8 months after sowing.
Choosing A Suitable Location In The Garden
Choosing a suitable location in the garden for growing garlic is an important step for a successful harvest. Garlic needs an open, sunny position and well-drained soil.
To ensure this, it’s important to choose a site with full sun and soil that doesn’t become waterlogged. Areas with good air circulation are also ideal. If you’re planting garlic in a pot or container, make sure it has good drainage and position it somewhere that gets plenty of sunlight.
A soil test is recommended to check the pH level of the soil before planting. Garlic prefers slightly acidic soils with a pH between 6.0 and 7.0. If the soil is too acidic or alkaline, incorporate organic matter such as compost or manure to help adjust the pH levels.
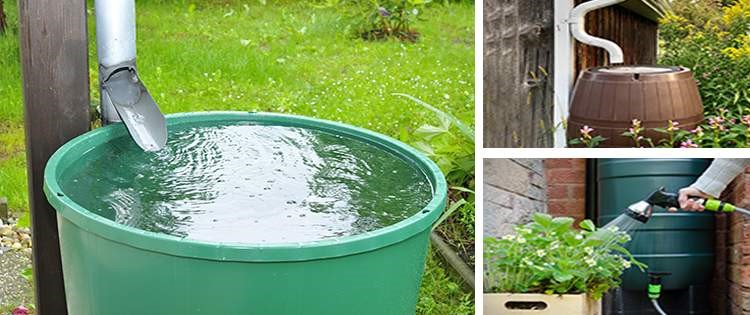
DIY PROJECT: Collect rainwater no matter where you live...
This DIY project is the best way to legally collect rainwater NO MATTER where you live. Get chlorine-free water, cut down on your water bills, and have enough for an emergency situation or to water your garden. Read More Here...
Once you’ve chosen the ideal spot for your garlic crop, it’s time to prepare the soil.
Preparing The Soil
To ensure a successful harvest, it is important to make sure the soil is loose and fertile. Sandy loam is the ideal soil for growing garlic, as it is well-drained and provides good drainage. If you have clay-based soil or drainage issues, you can incorporate organic matter like compost and sheep pellets to improve the texture and fertility of the soil.
Start by loosening the soil with a digging fork, aiming for a depth of 2-3 inches. Once loosened, add organic matter such as compost, sheep pellets and aged manure, mixing them in thoroughly to ensure even distribution. A layer of mulch or straw can then be added on top, which will help to retain moisture in the soil while also suppressing unwanted weeds.
Before planting your garlic bulbs, it is also important to make sure they are in full sun and have their own bed without any competition from weeds or other crops. Make sure to create beds that are long enough and wide enough so that there is plenty of room for each bulb to expand without being cramped by its neighbours. When planting your bulbs, aim for an area with good air circulation to help prevent disease and pest infestations.
Planting The Bulbs
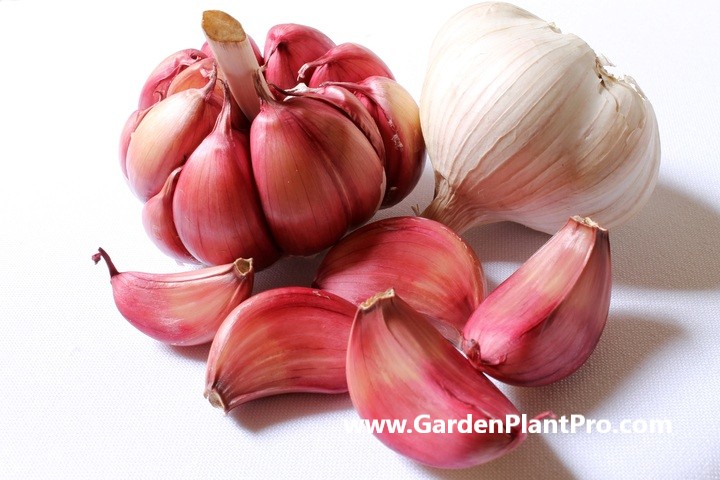
Planting the bulbs is an important part of growing garlic in the home garden. Before planting, the bulbs should be broken up into individual cloves.
The cloves should then be planted 10 to 15 cm apart, with 30 cm between each row. Plant the cloves with the fat end downwards and the pointy end 2.5 cm below the soil. Press the cloves into the soil with the narrow end up so they are just covered – approximately twice as deep as the clove. Space bulbs diagonally, at 10 – 20cm spacings. Use closer spacings if your soil is of good quality and there is a low likelihood of rust or disease in your area.
Once planted, it is important to water regularly and ensure that your seedlings receive adequate nutrients throughout their growth cycle. Fertilizing every three weeks with a balanced fertilizer will assist in achieving strong and healthy garlic plants.
Additionally, companion planting can help to keep pests and diseases away from your garlic crop, so choosing beneficial plants for your garden is important.
Caring For The Seedlings
Once the garlic bulbs have been planted, they need to be cared for during their growth period. The soil should be kept fairly moist, but not overly wet. Mulching the soil around the plants with organic matter such as straw or bark chips can help keep the soil moist and reduce weeds. Garlic does not require much feeding, but light applications of a balanced organic fertilizer may be beneficial.
Weeds should also be removed from around the plants as they can compete for nutrients and water. Hand weeding is best, as garlic is sensitive to chemical weed killers.
Garlic also benefits from regular watering and should be watered deeply once a week during dry periods. The plants can also benefit from a foliar spray of liquid seaweed or fish emulsion once or twice during the growing season.
It is important to monitor the garlic for any signs of disease or pests.
If any signs appear, prompt action should be taken to control them before they spread to other plants in the garden. Common diseases include rust, white rot and pink root rot, while common pests include aphids, slugs and snails. A range of organic control measures can be used to combat these problems without harming beneficial insects in the garden.
Watering & Fertilizing
Proper watering and fertilizing are essential for growing healthy garlic. For best results, water the garlic deeply every 8–10 days if the spring is dry. As summer approaches, taper off the frequency of watering.
Fertilize your garlic with a high-nitrogen fertilizer when planting and then again when the plants are 6–8 inches tall. When it comes to fertilizing, it is important to not overdo it as this can cause the garlic to burn or be less flavorful. Molasses can also be used to feed your garlic plants. Molasses contains many nutrients and can act as a liquid fertiliser for the microbes in the soil.
It is also important to keep the soil well-drained so that the garlic does not rot. To help with drainage, consider mixing some compost or other organic material into the soil prior to planting. Additionally, make sure your chosen location has access to plenty of full sun for optimal growth and flavor.
When & How To Harvest
Harvesting garlic is a crucial step in the process of growing garlic at home. The timing of when to harvest is largely dependent on the weather, but generally, you will want to harvest when the leaves of the plant have begun to die back. Once the majority of leaves have died back, it is time to harvest.
Do you have some charcoal in your house right now? We call charcoal a “miracle leftover” for anyone who wants to be a little more self-sufficient and cut costs. That’s because it can help you with so many different things around the house and garden. You can even use it to make an energy-free fridge. Read More Here...
To begin harvesting, carefully dig around the plant and loosen the soil with a garden fork or trowel. Once the plant is loose, gently lift it up and away from the soil. It is important to be careful when harvesting as garlic bulbs can easily be damaged or bruised.
Once you have lifted the garlic plants out of the ground, brush off any excess dirt and allow them to dry in a warm, well-ventilated area. This helps to further cure and toughen up the skin on each bulb. After several days, trim off any remaining leaves and roots and store your garlic in a cool, dark place. Properly stored garlic can last for several months.
Now that you’ve harvested your home-grown garlic crop, you can enjoy the fruits of your labour. Garlic provides a range of nutritional benefits and adds incredible flavour to many dishes. With careful preparation and tending throughout its growth cycle, you can ensure a successful harvest each year.
Storing
Storing garlic correctly is essential to ensure you can enjoy your home-grown garlic for many months. After harvesting, the bulbs need to be cured in a warm and dry environment with good ventilation. This curing process usually takes around two weeks, depending on the climate. Once cured, you can cut the stalks an inch (2.5 cm) above the bulb before storing.
The ideal storage environment is dark and cool, with good air circulation. The temperature should be around 55–60°F (13–16°C), and the humidity should be between 65–70%. If stored in a warm and damp environment, your bulbs will start to sprout prematurely. Avoid storing them in a refrigerator as this will cause them to rot.
You can store garlic bulbs individually or in bundles; just make sure there is enough air circulation between them. Store them in a paper bag or breathable mesh bag, but avoid plastic bags as this will trap moisture and cause rot.
Garlic stored this way will last for several months, but it’s best to use it within the first two months for optimal freshness and flavor. You can also save some of your harvest for next year’s planting season – just make sure it is properly dried before storing it away until springtime.
Common Diseases & How To Control Them
Garlic is vulnerable to a number of diseases, including Fusarium, Rust and White Rot. Luckily, these can be managed with proper prevention and control measures.
Fusarium
Fusarium can be identified by white or yellow spots on the lower leaves of the plant. It is caused by a fungus in the soil and can spread quickly, so it’s important to remove any infected plants immediately. To prevent Fusarium, make sure to use disease-free garlic bulbs when planting, as well as keeping weeds away from the growing area.
Rust
Rust is another fungal disease that can present itself in red-orange spots on the leaves of garlic plants. It can spread quickly, so you should remove any infected plants as soon as possible. Additionally, you should space your garlic plants further apart than usual to ensure proper air circulation and reduce the risk of rust spreading.
White Rot
White Rot is a fungal disease caused by soil-borne fungi that affect both the roots and stems of garlic. The first sign of this disease is wilting leaves, followed by a white rot on the bulb itself. To prevent White Rot from affecting your crop, make sure to rotate crops every three years and use healthy bulbs for planting. Additionally, if you notice any signs of White Rot in your crop, destroy infected plants immediately and avoid cultivating in that area for at least two years.
By following these simple precautions – such as using disease-free bulbs, controlling weeds and spacing plants properly – you can help protect your crop from common diseases such as Fusarium, Rust and White Rot.
Common Pests & How To Control Them
Garlic, like many plants, is prone to pests. Common pests that attack garlic include aphids, thrips, spider mites, cutworms, onion maggots and even the occasional rodent. To protect your garlic from pests, you can use natural methods such as companion planting, or use a natural soap or oil spray.
If you decide to use a natural soap or oil spray, test a small section of your plant or one you wish to protect from pests first before drenching it. You can mix a solution of garlic water with a 1% solution of liquid soap or oil and spray it over the entire plant.
You should also regularly inspect your garlic for signs of pests and take action as soon as you identify an infestation. If you spot any pests on the leaves or stems of the plant, pick them off by hand and dispose of them in a sealed container away from any other plants. You can also remove damaged leaves and stems to help reduce pest numbers.
Finally, make sure your soil is healthy and free of weeds which are often hosts for pests. Regularly cultivate around the plants to disrupt pest populations and keep the soil weed-free.
Additionally, ensure your plants get enough light and air circulation which helps to reduce pest population build-up.
CASE STUDY: We've been living off the grid for the last 40 years...
In all that time an electric wire has never been connected to our house. We haven’t gotten or paid an electricity bill in over 40 years, but we have all the electricity we want. We grow everything we need, here, in our small backyard. We also have a small medicinal garden for tough times. Read More Here...
Beneficial Companion Plants
Growing garlic with companion plants can help to enhance its growth and improve the health of your garden. Companion planting is the practice of growing different plants together that have a mutually beneficial relationship. Here are a few beneficial companion plants for garlic:
Tomatoes: Tomatoes and garlic are often grown together because they have similar nutrient requirements and can help each other to deter pests. Garlic has a natural insect repellent property that can protect tomato plants from pests, and in return, the tomato plant can provide shade for the garlic, helping to keep the soil moist and cool.
Roses: Garlic can help to protect roses from pests and diseases, and the roses can provide a physical barrier that can help to keep pests away from the garlic.
Brassica Family: Plants like broccoli, cauliflower, and cabbage are also good companion plants for garlic. They all belong to the brassica family, which is known for its ability to suppress soil-borne diseases and pests. Garlic can help to enhance the growth of these plants by repelling pests, and in return, the brassica plants can provide shade for the garlic, helping to keep the soil cool and moist.
Peppers: Peppers and garlic are good companion plants because they both prefer similar growing conditions and can deter the same pests. In addition, garlic can help to improve the flavor of peppers.
Companion planting can be a great way to enhance the growth of garlic and improve the overall health of your garden. When planting garlic, consider adding these beneficial companion plants to your garden for the best results.
Using Your Home Grown Garlic
Using your home-grown garlic is a simple and satisfying process. Once you have harvested the garlic bulbs, you should brush off any dirt that may be clinging to them. Cut away any roots and trim off any excess stems. You can then store your garlic bulbs in a cool, dry location with good air circulation.
Freshly harvested garlic can be used in many recipes, from soups to marinades to sauces. When cooking with garlic, the cloves can be chopped or pressed into a paste, depending on the dish. Garlic can also be roasted, baked, or grilled for added flavor.
Garlic bulbs can also be dried or cured for storage and future use. To dry garlic bulbs, spread out the cloves in a single layer on paper towels and leave them in a cool and dark place for several weeks. Once dried, the cloves can be stored in an airtight container for up to six months.
Curing is another option for preserving garlic bulbs. To cure garlic bulbs, hang them in bunches in a warm and dark place for several weeks until the cloves are dry and papery. Cured garlic should be stored in an airtight container in a cool, dry place for up to six months.
Garlic powder is another way to store home-grown garlic for future use. To make garlic powder, simply grind dried garlic into a fine powder using a food processor or spice grinder. The powder can then be stored in an airtight container in a cool and dark place for up to six months.
No matter how you choose to use your home-grown garlic, it’s sure to add flavor and nutrition to any dish. With proper care and harvesting methods, you will have delicious homegrown garlic all year long.


