Cauliflower is a popular and nutritious vegetable that can be easily grown in a home garden. With proper care, you can enjoy fresh, crisp, and delicious cauliflower right from your own backyard. Growing cauliflower at home is a rewarding experience that provides you with fresh produce, saves you money, and helps you reduce your carbon footprint by avoiding store-bought vegetables.
This guide will provide you with step-by-step instructions on how to grow healthy and bountiful cauliflower plants, from selecting the right variety to harvesting and storing your crop. Whether you’re a seasoned gardener or a beginner, this guide will help you successfully grow cauliflower in your home garden.
A Brief History
Cauliflower is one of the oldest known vegetables. It is believed to have first been grown in Asia Minor and was likely spread by the Greeks and Romans throughout Europe. The vegetable has been cultivated since the 16th century, with the first records of its cultivation in France and Italy. In the 18th and 19th centuries, cauliflower spread to the United States and became increasingly popular as a food item through the 20th century.
Today, cauliflower is grown in many countries around the world, including Canada, India, China, Mexico, and the United States. It is a versatile vegetable that can be eaten raw or cooked in a variety of dishes. The vegetable is an excellent source of dietary fiber, vitamins C and K, folate, and other nutrients. It has a high water content, making it an ideal choice for those looking to stay hydrated.
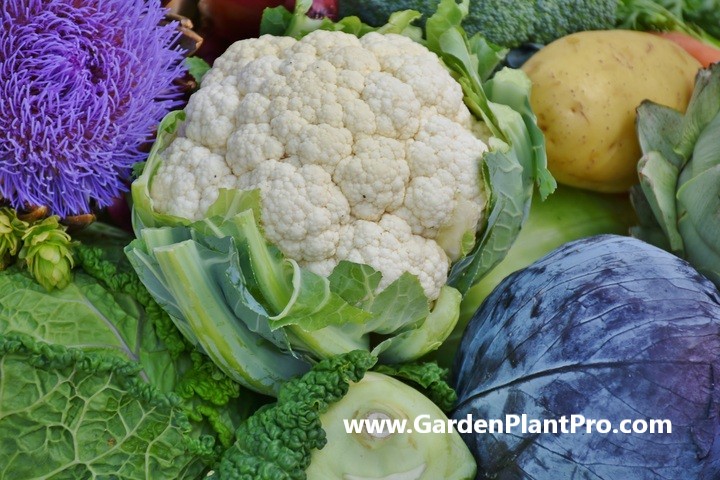
Cauliflower comes in a variety of colors, including white, orange, green, and purple. Each variety of cauliflower has its own unique taste and texture. White cauliflower tends to be milder in flavor than other varieties but still retains its crunchy texture when cooked. Orange cauliflower has a slightly nutty flavor similar to that of roasted chestnuts. Green or purple varieties are less common but are known for their slightly sweet flavor profile and their softer texture when cooked.
Nutritional Benefits
Cauliflower is a nutrient-rich vegetable that offers many health benefits. It is an excellent source of Vitamin C and Vitamin K, as well as antioxidants like glucosinolates. It is also a good source of dietary fiber, folate, magnesium, phosphorus, and potassium. Eating cauliflower regularly can help improve overall health and provide essential vitamins and minerals for the body.
As an antioxidant-rich vegetable, cauliflower helps protect against oxidative damage to cells and tissues in the body. The Vitamin C in cauliflower helps boost the immune system and protect against infection, while the Vitamin K helps support bone health. The dietary fiber found in cauliflower can help improve digestion, reduce blood sugar levels, and lower cholesterol levels. Folate helps support cell growth and development, while magnesium helps regulate blood pressure levels. Phosphorus and potassium are important for healthy muscle contraction and nerve transmission.
Eating cauliflower regularly can help improve overall health and provide essential vitamins and minerals for the body. It is an excellent source of antioxidants as well as dietary fiber, folate, magnesium, phosphorus, and potassium – all of which are important for maintaining good health.
Common Varieties & Their Uses
Cauliflower is an incredibly versatile vegetable and can be used in a variety of dishes.
There are many different varieties of cauliflower, each with its own unique flavor, texture, and taste. Depending on the variety you choose, it can be cooked in a variety of ways, from steaming and stir-frying to roasting and baking.
The most common varieties of cauliflower are ‘Snowball’, ‘Romanesco’, ‘Cheddar’, ‘Veronica’, ‘Green Goddess’ and ‘Purple of Sicily’.
‘Snowball’ is a fast-growing variety that matures around 12 weeks from transplanting. It has white compact heads that are great for steaming or boiling and is resistant to bolting. The heads are also great for roasting or baking.
‘Romanesco’ is another popular variety with an intense green color and beautiful spiral pattern. The heads are firm and crunchy, making them ideal for roasting or serving raw in salads.
‘Cheddar’ is an orange-colored cauliflower with a sweet flavor and crisp texture. It’s best eaten raw but also can be cooked in a variety of ways such as boiling, steaming, and roasting.
‘Veronica’ is a white variety with small, round heads that are perfect for pickling or eating raw in salads. It’s quite hardy but susceptible to cabbage worms.
‘Green Goddess’ is a dark green cauliflower that has a nutty flavor when cooked. It can be boiled, steamed or roasted and used as a side dish or incorporated into recipes such as soups or casseroles.
Lastly, there’s the ‘Purple of Sicily’ variety which has deep purple heads with white specks throughout. It’s best served raw in salads but can also be boiled, steamed, or roasted for more flavorful dishes.
When To Sow
The best time to sow cauliflower is during the cool season, from late summer to early winter. It is important to consider the length of time it will take for the plants to reach maturity; for example, most varieties of cauliflower take between 75-90 days to mature. If sowing too early in the season, the cauliflower may bolt before reaching maturity.
It is also important to check the temperature of the soil before sowing. The ideal soil temperature for sowing cauliflower should be between 10-21°C (50-70°F). If the soil temperature is too low, germination may be delayed and if it is too high, it may cause the seeds to rot.
When sowing directly into the garden bed, sow two or three seeds per position and thin out when seedlings are established. When sowing into seed trays, ensure that each cell has two or three seeds and keep them moist until they have germinated. Once germinated, gradually introduce them to outdoor conditions over a period of one week and then transplant when appropriate.
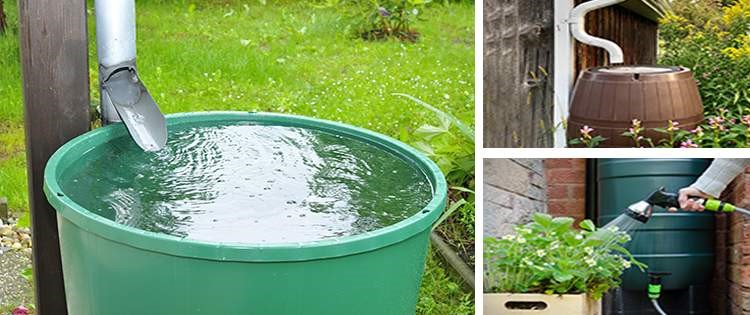
DIY PROJECT: Collect rainwater no matter where you live...
This DIY project is the best way to legally collect rainwater NO MATTER where you live. Get chlorine-free water, cut down on your water bills, and have enough for an emergency situation or to water your garden. Read More Here...
Choosing A Suitable Location In The Garden
Choosing a suitable location in the garden is an important part of successfully growing cauliflower. When selecting a spot, it’s best to find a full sun, sheltered position that has plenty of room for plants to grow without competition. Aim to space them at least 50cm-70cm apart to ensure they have enough space to fully mature. Pick a position that receives at least 6 hours of sun per day.
It is also important to prepare the planting area well before planting, which can be done by digging in Yates Thrive Natural Blood & Bone for extra nourishment and improved soil structure. This will help ensure the seedlings have the best start possible.
For fall crops, seeds can either be started indoors or direct seeded in the garden. If starting indoors, sow seeds 4-6 weeks before the last expected frost date and transplant them into the garden once they are big enough. For direct seeding, sow seeds when soil temperatures reach at least 10°C (50°F).
If you’re growing white cauliflower, you may also want to blanch it for a whiter head colour; this can be done by loosely wrapping the head with a large piece of paper or cloth and securing it with twine or rubber bands when it reaches about 10cm (4in) in diameter. This will help protect it from sunlight and keep it from turning purple or green.
Once you’ve found the perfect spot in your garden and prepared the soil appropriately, your cauliflower plants should be ready for planting! Keep in mind that caring for seedlings correctly is key to successful harvests; water regularly and fertilize when necessary to maintain strong growth.
Preparing The Soil
To prepare the soil for cauliflower, it is important to make sure that it is free-draining and rich in organic matter. An ideal soil pH for cauliflower is 6.5-7.5. A soil test can be conducted to determine the current pH levels and make adjustments as needed.
Adding aged manure and compost before planting will help create a nutrient-rich environment for the cauliflower. It is also beneficial to mix in a 5-10-10 fertilizer to the soil before planting for additional nutrients. Consider using a raised bed or row for optimal drainage, as cauliflower does not take kindly to soggy conditions.
Planting The Seeds Or Seedlings
Once you have chosen a suitable location and prepared the soil, it’s time to plant your cauliflower seeds or seedlings. When planting from seed, it is best to start the process by sowing in starter pots or trays with Yates Black Magic Seed Raising Mix.
Sow the seeds, cover them, firm down the soil and water well. Keep the soil moist so the seeds don’t dry out. Cauliflower seed germination can take 8-10 days. Seedlings should then be transplanted into prepared garden beds, spacing plants 18-24 inches apart with 30 inches between rows.
When planting cauliflower seedlings, it is important to thoroughly water your plants before planting and to allow them to drain. An ideal depth and width for a hole is approximately twice the size of the root ball of your plant. After planting, side-dress the plants with a high-nitrogen fertilizer 3 to 4 weeks later. Once two true leaves are present, apply fertilizer twice a week. A half-strength starter solution should be used once a week for best growth.
Caring For The Seedlings
Once planted, seedlings need to be carefully monitored and groomed in order to ensure a successful crop. Caring for the seedlings involves several important steps.
Firstly, it is important to keep the soil moist so that the seedlings don’t dry out. This can be done by watering the plants regularly, ensuring that the water penetrates deep into the soil. It is also important to avoid over-watering, as this can lead to root rot and other problems.
Secondly, it is important to protect the seedlings from pests and diseases by keeping the area around them clean and free of weeds and debris. In addition, regular monitoring for signs of any problems should be conducted so that any issues can be addressed promptly.
Thirdly, it is important to provide adequate nutrition for the seedlings in order to ensure healthy growth. This can be done by applying a balanced fertilizer according to manufacturer’s instructions. In addition, compost can be added in order to increase soil fertility.
Fourthly, it is important to provide adequate sunlight for the seedlings in order to promote strong growth. If planting in a bed or container, position the plants so that each one receives equal amount of sunlight throughout the day. If planting in a greenhouse or cold frame, ensure that there is sufficient ventilation and light available for all plants.
Finally, it is important to regularly prune and thin out seedling plants in order to maintain an ideal shape and allow enough space between individual plants for healthy growth. Pruning should be done carefully using sharp pruning shears or scissors so as not to damage the plant. Thinning should also be done carefully so as not to damage neighbouring plants while encouraging strong growth of individual plants.
Watering & Fertilizing
Watering and fertilizing are essential parts of growing cauliflower in the home garden.
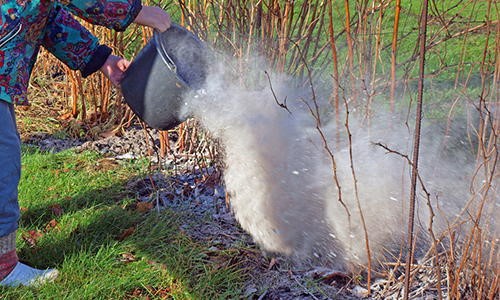
Do you have some charcoal in your house right now? We call charcoal a “miracle leftover” for anyone who wants to be a little more self-sufficient and cut costs. That’s because it can help you with so many different things around the house and garden. You can even use it to make an energy-free fridge. Read More Here...
When watering your cauliflower plants, it is best to use a soaker hose or drip line rather than overhead sprinklers. This is because overhead irrigation can cause the soil to become too wet, leading to root rot or other diseases. Be sure to water deeply and infrequently so that moisture penetrates deep into the soil and not just on the surface. This will also help encourage healthy root development and discourage weeds from germinating.
Fertilizing cauliflower is also important in order to achieve optimal growth and yield. For young plants, use a balanced fertilizer such as 10-10-10, applied according to package directions. As your plants mature, switch to a low nitrogen fertilizer such as 1-5-5 or 2-5-5. Apply fertilizers in several applications throughout the growing season for optimal results.
These tips will help ensure that your cauliflower plants get the nutrition they need for healthy growth and maximum yields in the home garden.
When & How To Harvest
When it comes to harvesting your cauliflower, timing is key.
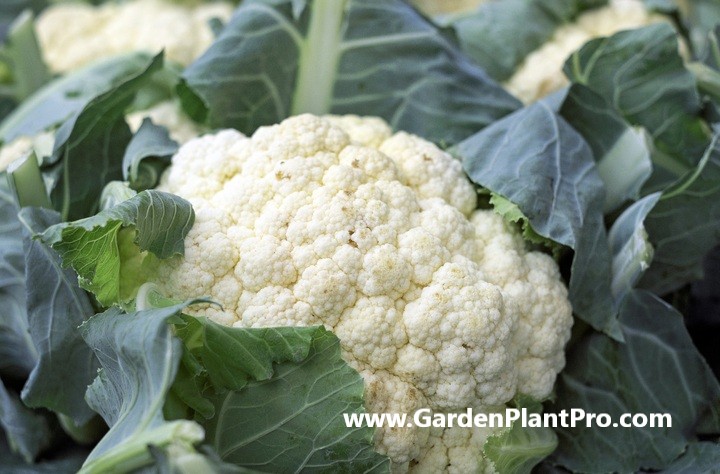
The heads should be harvested when they are still tight and white, and before they start to spread as this is when they lose their flavour. To harvest, simply cut off the head at the base and pull out the root. It is important to cut the head off before removing the root as doing it in reverse can damage the plant.
Cauliflower can be harvested year-round, depending on when you sow the seeds or seedlings. Generally, it takes three to five months from sowing to maturity. The growth rate will depend on a number of factors such as weather, soil quality and care taken in caring for the plants.
Once harvested, cauliflower should be stored immediately in a cool dry place or in the refrigerator until ready to use. Cauliflower can be used fresh or cooked and can be stored for up to seven days in the refrigerator. It is best used within two days of purchase if bought from a store.
Storing
Once the cauliflower is harvested, it needs to be stored correctly to maintain its freshness and flavor. Cauliflower is best stored unwashed in a perforated plastic bag in the vegetable crisper drawer of the refrigerator. It will keep for two to four weeks if stored properly.
It is important to note that cauliflower gives off a strong odor when stored, so it should be wrapped in a damp cloth or paper towel before being placed in the plastic bag. As an alternative to refrigerator storage, cauliflower can also be frozen for up to eight months for longer-term storage. To freeze, blanch the cauliflower first and then cool it down quickly before packing into air-tight containers or freezer bags for storage in the freezer.
Common Diseases & How To Control Them
Cauliflower plants are susceptible to a few common diseases, including clubroot, downy mildew and black rot. It’s important to be aware of these diseases and take steps to prevent them from affecting your crop.
Clubroot
Clubroot is a soil-borne fungus that causes distorted roots, stunted growth and yellowing of leaves. To prevent clubroot, it’s important to treat your seeds with a fungicide before planting and sow either directly into soil or in pots if the disease is a problem in your soil. You can also try rotating your crops every three years to reduce the chances of infection.
Downy Mildew
Downy mildew is a fungal disease that causes yellow spots on the leaves and stems, followed by greyish-white patches of mould on the underside of the leaves. To reduce the risk of infection, avoid overhead watering and overcrowding plants, as this encourages humidity which is ideal for the spread of this disease.
Black Rot
Black rot is caused by a bacteria that affects both the leaves and heads of cauliflower plants. Symptoms include wilting or yellowing leaves and stunted growth. To control black rot, it’s important to avoid overhead watering, water at ground level instead, rotate crops every three years, practice good sanitation and remove infected plants as soon as possible.
Common Pests & How To Control Them
Common pests can be a major issue for growing cauliflower at home. Luckily, there are several methods that can be used to control them.
Aphids, flea beetles, slugs, snails and other small, soft-bodied flying bugs can reduce plant health by sucking sap from leaves and stems. Yates Success Ultra Insect Control – Concentrate is a great way to help control common caterpillars, thrips, codling moth and tomato potato psyllid. Insecticidal soap or oil is also often used in controlling bugs on cauliflower plants.
When choosing a location in the garden to grow cauliflower, it is important to consider planting a barrier of another plant that pests may be attracted to. Doing so may help keep them away from the cauliflower plants. If all else fails and pests become an issue, it may be necessary to use insecticides. However, it is best to only use them as a last resort as they can have negative environmental consequences.
Beneficial Companion Plants
When selecting companion plants for cauliflower, it is important to remember that they should be beneficial to the crop. Good companion plants for cauliflower include chard, radishes, cucumbers, thyme, sage, and basil.
CASE STUDY: We've been living off the grid for the last 40 years...
In all that time an electric wire has never been connected to our house. We haven’t gotten or paid an electricity bill in over 40 years, but we have all the electricity we want. We grow everything we need, here, in our small backyard. We also have a small medicinal garden for tough times. Read More Here...
Chard helps improve the efficiency of your growing project, while radishes help to loosen the soil. Cucumbers provide shade and help keep the roots cool in hot weather. Additionally, herbs like thyme, sage, and basil attract pollinators and can help deter certain pests.
It is important to avoid planting brassicas like cabbage, broccoli, Brussels sprouts, or other brassicas near cauliflower. These plants are all heavy feeders and will compete with one another for resources. Beans and cauliflower are an ideal combination as they both require similar soil conditions and will not compete for nutrients.
Once you have selected the best companion plants for cauliflower, it is important to prepare the soil correctly before planting. Dig up the soil to a depth of 8-12 inches (20-30 cm) and incorporate compost or aged manure into it to improve nutrient content and drainage. Plant your companion plants a few weeks before sowing the cauliflower seeds or seedlings so they have time to establish themselves in the garden.
Water regularly throughout the growing season, but be careful not to overwater as this can lead to root rot and other diseases in your plants. Fertilize with an organic fertilizer once a month during the growing season to keep your plants healthy and productive. Harvest your cauliflower when it is mature by cutting it at its base with a sharp knife or garden shears. Store harvested cauliflower in a cool place with high humidity for up to two weeks after harvesting.
Following these simple steps will ensure that you have healthy companion plants for your cauliflower crop that will benefit both your crop yield and overall garden health.

Use In Cooking
Cauliflower is a versatile vegetable that can be used in many different ways in the kitchen. It can be roasted, steamed, stir-fried, or even mashed. Cauliflower is also a great substitute for potatoes and rice, making it a popular choice among those following low-carb and keto diets.
To roast cauliflower, preheat the oven to 400F (204C). Cut the cauliflower into small florets and place them on a baking sheet lined with parchment paper. Drizzle with olive oil or melted butter, season with salt and pepper, and toss to coat evenly. Roast for about 30 minutes, stirring once halfway through cooking. Serve as a side dish or use in your favorite recipes.
Steamed cauliflower can also be prepared quickly and easily. Start by bringing a pot of salted water to a boil over medium-high heat. Add the cauliflower florets to the boiling water and reduce heat to medium-low. Cook for about 5 minutes until the cauliflower is tender when pierced with a fork. Drain the cooked cauliflower in a colander and serve as a side dish or add it to your favorite recipes.
Stir-frying is another great way to cook cauliflower. Heat 2 tablespoons of oil in a large skillet over medium-high heat. Add the cauliflower florets and stir-fry for 3 to 4 minutes until they’re lightly browned and tender. For extra flavor, you can add garlic, ginger, or other spices to the pan before adding the cauliflower. Serve as a side dish or use in your favorite recipes.
For an easy mash, steam or boil the florets until they are fork tender before mashing with a potato masher or using an immersion blender to get desired consistency. You can also use cream cheese or sour cream to give it more flavor and creaminess. Serve warm as a side dish.


