Cabbage is a versatile and nutritious vegetable that is easy to grow in your own vegetable garden. Whether you are a seasoned gardener or just starting out, cabbages are a great choice for adding to your garden. With its crisp texture and mild flavor, cabbage can be used in a variety of dishes, from coleslaws to stir-fries, and even soups. Growing cabbages in your vegetable garden not only provides you with a delicious and healthy food source, but it is also a fun and rewarding hobby.
A Brief History
Cabbage is a vegetable that has been cultivated for thousands of years. It is believed to have originated in the Mediterranean region, and evidence of its use dates back to 600 BC. The ancient Greeks and Romans used cabbage for both medicinal and culinary purposes. Cabbage was also popular among the ancient Chinese, who used it as a food staple and for medicinal purposes. In Europe, cabbage was introduced in the 15th century and quickly became a popular crop.
Today, cabbage is one of the most widely consumed vegetables in the world. It is eaten raw or cooked in a variety of dishes, or it can be fermented to make sauerkraut. Cabbage is an excellent source of many essential vitamins and minerals, including calcium, potassium, vitamin C, and dietary fiber. It also contains antioxidants that help protect against certain diseases.
Cabbages come in many different shapes and sizes. Common varieties include savoy, red, green, and napa cabbages. Each variety has its own unique flavor and texture that make it suitable for different culinary uses. No matter which type you choose to grow in your garden, you can be sure you’ll be enjoying a nutritious vegetable that has been enjoyed for centuries!
Nutritional Benefits
Cabbage is a great addition to any vegetable garden due to its nutritional benefits. It is an excellent source of fiber and very low in calories, yet contains a substantial amount of amino acid glutamine which our bodies need to produce HGH. Additionally, it is rich in minerals such as calcium, magnesium and potassium. Adding this vegetable to your diet is a great way to get these essential minerals without having to resort to supplements.
It’s also very low in fat and high in vitamins C, K, A and B6. Eating cabbage regularly has been linked with improved heart health, as well as being beneficial for the skin, bones and digestive system. It can even help with the healing of cuts and other minor wounds.
When growing cabbage in your vegetable garden, heavy mulching will help build soil, prevent nutrient leaching, and keep plants cool in the heat of summer. Additionally, it is important to supply the plant with plenty of water and nutrients since it is a heavy feeder that quickly depletes the soil of nutrients.
Common Varieties & Their Uses
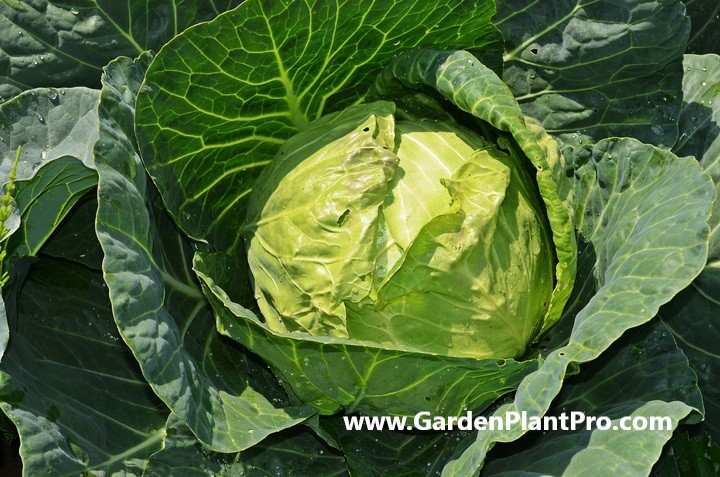
When it comes to growing cabbages in your vegetable garden, there are many different varieties to choose from. Each type of cabbage has its own unique characteristics and uses. Some of the most popular varieties include the green cabbage, savoy cabbage, and red cabbage. Each of these varieties is used in different ways in the kitchen.
Green Cabbage is one of the most widely available and widely used varieties of cabbage. It is perfect for coleslaw, salads, soups, and stir-fries. This variety is also great for pickling, fermenting, and braising.
Savoy Cabbage is a bit sweeter than green cabbage and has a slightly more delicate texture. It is excellent for salads, soups, and stews. This variety is also great for steaming or lightly sautéing as a side dish.
Red Cabbage has a slightly nutty flavor that adds an extra layer of flavor to dishes like salads, slaws, stir-fries, stews, and soups. This variety is also great for pickling or fermenting.
When To Sow
Cabbages can be sown at different times depending on the climate and growing conditions in your area. In cooler climates, cabbages can be sown in early spring, while in warmer climates, they are best sown in late summer to early autumn. In areas with a mild climate, cabbages can be sown at any time of the year.
It’s important to consider the temperature and amount of light when planting cabbages, as they prefer cooler weather and grow best in full sun to partial shade.
For fall plantings, start seedlings in summer about 12 to 14 weeks before the first expected frost, transplanting into the garden when plants are ready.
It is best to harden off the plants over the course of a week before planting them outdoors. This allows them to adjust to the outdoor environment more smoothly and prevents shock.
Choose a sunny site with firm soil for planting and prepare the ground in autumn by adding organic matter such as compost or manure. Once planted, ensure they get watered around 2-3 times a week and fertilize them regularly. Be careful not to over water as this can lead to disease and nutrient deficiencies.
To ensure successful growth, check the planting guidelines on the seed packet or consult with a local gardening expert for advice on the best time to sow cabbages in your area.
Choosing A Suitable Location In The Garden
Choosing the right location for your cabbage plants is essential for a successful harvest. When selecting a spot, it is important to look for an area that receives plenty of sunlight, as cabbages require at least 6 hours of direct sun each day. Additionally, you should look for a spot with well-drained soil as cabbages are prone to root rot if they are over-watered.
Prior to planting in this area, it is also important to prepare the soil by adding plenty of organic matter such as compost and manure. This will help provide the nutrition and drainage needed for your cabbage plants to thrive.
It is also important to consider how much space you have available for planting your cabbages. If you have limited space in your vegetable garden, then growing one or two in large containers may be an option. However, cabbages do best in open ground and overcrowding them can lead to poor growth and fewer heads of cabbage produced.
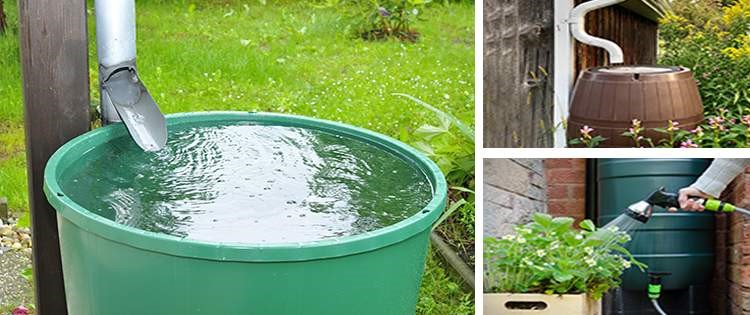
DIY PROJECT: Collect rainwater no matter where you live...
This DIY project is the best way to legally collect rainwater NO MATTER where you live. Get chlorine-free water, cut down on your water bills, and have enough for an emergency situation or to water your garden. Read More Here...
Finally, it is important to select vigorous and healthy seedlings when planting your cabbage patch, as this will give the plants their best chance at success. Avoid leggy or overgrown seedlings, as they are more likely to suffer from disease or pest infestations.
Preparing The Soil
Preparing the soil for cabbage plants is essential to ensure healthy growth. To achieve this, it is best to choose a sunny site that has been well prepared with lots of compost or well-rotted manure. A quality, light potting mix rich in humus and a little clay is ideal for the cabbage’s development.
Cabbages need an open, sunny site and rich soil to thrive. The soil should be moist but not waterlogged; too much water can cause the heads to split. To help maintain moisture levels, a layer of mulch such as straw or grass clippings can be applied after planting.
It is important to test the soil pH before planting. Cabbages prefer slightly acidic soils with a pH between 6 and 6.5; if the soil is too alkaline, add sulfur or aluminum sulfate to lower the pH. If the soil is too acidic, add lime or wood ash to raise the pH.
It’s also important to add a balanced fertilizer before planting to ensure that the cabbage has all the nutrients it needs for optimal growth. A 10-10-10 formula is recommended.
Finally, make sure to use fresh, disease-free seed or seedlings when sowing your cabbage plants in las this will help reduce the risk of disease and pest damage in your garden.
Planting The Seeds Or Seedlings
Once you have chosen a suitable location for your cabbage crop and prepared the soil, it’s time to plant. Cabbages can be grown from either seeds or seedlings.
To plant from seed, sow ¼ inch deep and keep moist. Transplant seedlings when they have at least three to four adult leaves, about six weeks after sowing.
When transplanting seedlings, dig a hole slightly larger than the root ball of the seedling and amend the soil with compost or aged manure. Gently press the soil around the roots of the seedling to ensure good contact with the soil and firm it down lightly. Water well after planting to help the root system get established.
If planting in rows, space plants 12-18 inches apart, with 18-24 inches between rows. If planting in hills, space plants 10-12 inches apart in a circle around each hill.
Caring for young seedlings is important to ensure a good harvest. Water regularly and apply compost or aged manure every few weeks to keep the soil well nourished throughout the growing season. Be sure to monitor for pests and diseases as well and take action if necessary.
Caring For The Seedlings
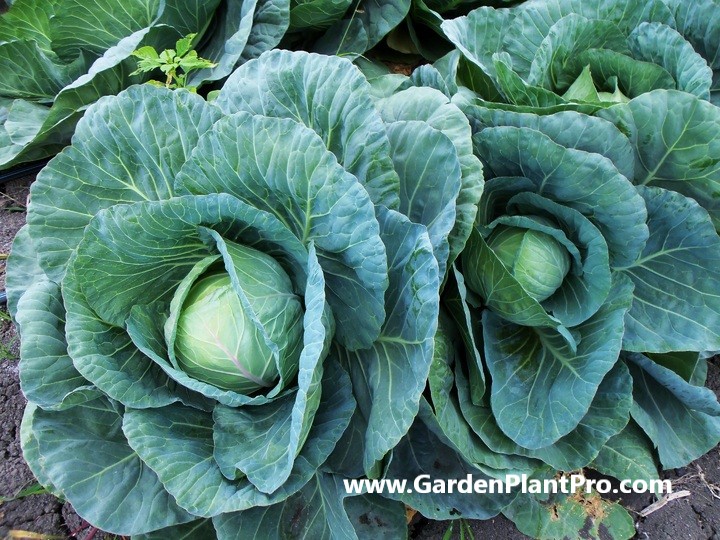
Once the seedlings have been planted, it is important to care for them properly in order to ensure a successful harvest. Cabbages need watering around 2-3 times a week, but be careful not to over water. Too much water can cause root rot and stunt growth. The soil should be kept consistently moist but not soggy. Fertilize the plants every few weeks with an organic fertilizer or compost tea.
Weeds can compete with cabbages for nutrients and should be removed regularly. Mulch around the plants to help conserve moisture and suppress weeds. Keep an eye out for common cabbage pests such as cabbage worms, aphids, and caterpillars. If these pests become a problem, use an organic solution like neem oil or insecticidal soap to control them.
If possible, rotate cabbages with other crops every year to prevent disease build up in the soil and help keep pests away. Cabbage is a heavy feeder and benefits from regular fertilization throughout the growing season.
Watering & Fertilizing
Watering and fertilizing are essential for growing healthy cabbage plants.
It is important to keep the soil moist, but not overly wet. When planting, water in the seedlings or use a diluted solution of balanced (10-10-10) fertilizer to give them a good start. Fertilize two weeks after transplanting with a balanced (10-10-10) fertilizer and then again three weeks later with a nitrogen-rich fertilizer to provide the necessary nutrients for growth. Mulching around the plants can help keep the ground cool and moist. Regularly check the soil moisture level and water as needed.
Harvested cabbages can benefit from additional fertilization. After harvesting, apply a nitrogen-rich fertilizer, such as fish emulsion or blood meal, to give your remaining plants an extra boost of essential nutrients.
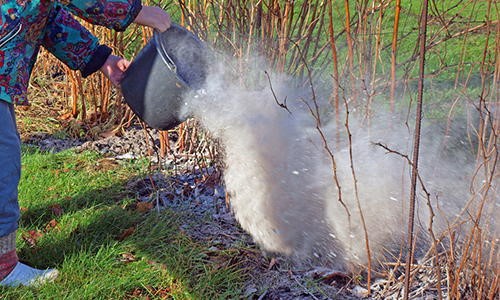
Do you have some charcoal in your house right now? We call charcoal a “miracle leftover” for anyone who wants to be a little more self-sufficient and cut costs. That’s because it can help you with so many different things around the house and garden. You can even use it to make an energy-free fridge. Read More Here...
Following these steps will help ensure that your cabbages grow healthy and strong and are able to withstand any pests or diseases that may come their way. With proper watering and fertilizing, you should have a robust harvest of delicious cabbages for you to enjoy.
When & How To Harvest
Once your cabbage plants are mature and ready to harvest, it’s time to start collecting your bounty! The best time to harvest your cabbages is in the morning, when the temperature is cooler and the leaves are still crisp.
The most common method of harvesting cabbages is to cut the entire head from the stalk. This can be done with a sharp knife or pruners. Make sure you leave at least two leaves on the plant after harvesting.
If you’re looking for smaller heads of cabbage, you can also cut off single outer leaves as needed. This will allow the head to continue growing, giving you multiple harvests from a single plant.
When harvesting, be sure to check each head for any signs of disease or damage. If you find any blemishes or discoloration, it’s best to discard them rather than risk introducing any problems into your garden.
Once harvested, store your cabbages in a cool and dry place. They should keep fresh for up to two weeks if stored correctly. If you’re looking for longer-term storage, consider pickling or freezing your cabbages for later use.
Storing
Cabbages can be stored in the refrigerator for up to two weeks. To ensure optimal freshness, it is best to wrap the cabbage tightly in a plastic bag before storing. Alternatively, they can be stored in a cool, dry place such as a root cellar. If you would like to store cabbages for longer periods of time, they can be frozen or pickled.
When freezing cabbages, it is important to blanch them first. Blanching involves boiling water and then plunging the cabbage into it for a few minutes before cooling it off quickly in cold water. This helps to preserve the nutrients and flavor of the cabbage. Once blanched, the cabbage can be sliced and frozen for up to one year.
Pickling is another great way to store cabbages for longer periods of time. Pickled cabbages can last for several months if stored in an airtight container or jar in the refrigerator. To pickle cabbages, they should be thinly sliced and mixed with vinegar, sugar and spices before being tightly sealed and refrigerated.
No matter how you choose to store your cabbages, keep in mind that they are best when eaten fresh! Freshly harvested cabbages provide more nutrients, flavor and texture than those that have been stored for long periods of time.
Common Diseases & How To Control Them
Cabbages are a valuable addition to any vegetable garden, but as with many plants, they can suffer from various diseases. Identifying and treating common cabbage diseases is an important part of keeping your plants healthy and free of infection.
Fusarium Wilt
Fusarium wilt is a fungal disease that affects the leaves and stems of cabbages. The disease starts with yellowing leaves and wilting of the stems, followed by the plant collapsing altogether. To prevent Fusarium wilt, avoid overwatering and ensure your cabbages have adequate drainage. To treat the disease, remove infected foliage, cut off the stem at ground level and discard it, and then treat the remaining plant with a fungicide.
Clubroot
Clubroot is another fungal disease that affects cabbages in particular. This disease causes yellowing leaves and stunted growth, followed by club-shaped galls on the plant’s roots. To prevent clubroot, make sure you rotate your crops every few years to avoid soil-borne pathogens spreading. If your plants become infected, you can treat them with a copper-based fungicide or a lime sulfur solution.
Downy Mildew
Downy mildew is another fungal disease that affects cabbages in particular. This disease causes yellow spots on the leaves, followed by white fuzzy spores forming on the underside of the leaves. To prevent downy mildew, make sure you water your cabbages from below rather than from above to reduce moisture on the leaves. You can also apply fungicides to your plants to help control this disease.
It’s important to keep an eye out for signs of any of these diseases in order to prevent them from spreading throughout your garden. Additionally, make sure you practice crop rotation and use organic soil amendments such as compost or manure to help improve soil health and reduce the chances of infection. With some basic care and preventive measures, you can
Common Pests & How To Control Them
When growing cabbages in your vegetable garden, it’s important to be aware of common pests and diseases that can affect your plants. Aphids are one of the most common pests and can be identified by their small size, soft bodies, and the presence of white or yellow spots on the stems and leaves. They feed on the sap of the plant, which can reduce growth and yield.
Physical controls are the best way to deal with aphids: You can remove them from plants by spraying them off with a sharp stream of water from the hose. Hand-squishing aphids is also an effective method of control, or you can cover affected plants with row cover to physically exclude them from feeding on your crop.
CASE STUDY: We've been living off the grid for the last 40 years...
In all that time an electric wire has never been connected to our house. We haven’t gotten or paid an electricity bill in over 40 years, but we have all the electricity we want. We grow everything we need, here, in our small backyard. We also have a small medicinal garden for tough times. Read More Here...
Removing debris and rotting material from the garden is another important way to combat infestation, as you’ll notice that several species are attracted to these sites. Growing vegetables with coloured leaves, like purple varieties of cabbage or kale, that insects won’t expect is also a good way to obfuscate them.
A practical way to control diseases is to clean away infected parts of the plant regularly so spores cannot spread or overwinter in leaf debris. If you do find your crop has been affected by a fungus or blight, it’s important to remove all affected plants from the garden immediately, as well as any debris where spores may persist.
By following these simple steps and taking preventative measures for common pests and diseases, you can help ensure a delicious harvest of cabbages from your vegetable garden.
Beneficial Companion Plants
When selecting companion plants for cabbage, look for those that have similar needs in terms of soil, sunlight and water. Carrots, beets, onions and parsnips make great companions for cabbage as they help to unearth nutrients from the soil. Mâche, Vit and Lamb’s Lettuce are all excellent under-recognized crops that also make great companions for cabbage. Additionally, Lovage makes an excellent companion plant as it can help to deter pests and give the cabbages some extra flavor.
When planting your companion plants, make sure to leave enough space between them and the cabbages so that they don’t overcrowd each other or compete for resources. Planting companion plants also has the added benefit of saving space in the garden. It’s also important to ensure that you are providing your companion plants with the same level of care as you are providing your cabbages; this includes ensuring that they get enough sunlight, water and nutrition through fertilization.
Once your companion plants are established in your vegetable garden they can provide numerous benefits to your cabbages. They will help to improve the quality of the soil by adding nutrients, help to reduce pests, and even improve the flavour of your cabbages. With careful selection and proper maintenance your companion plants can be a great addition to any vegetable garden!
Uses In Cooking
Once you have successfully grown your cabbages, it’s time to make good use of them in the kitchen. Cabbages can be eaten both raw and cooked, and they are incredibly versatile when it comes to cooking. Cabbage is often used in salads or coleslaws, but it can also be boiled, steamed, stir-fried, roasted or used in stews and soups.
The most important thing to remember when cooking with cabbage is to not over-cook it.
Cabbage should be cooked until just tender, as overcooking can cause it to become soggy and lose its flavor. If boiling or steaming cabbage, start checking for doneness after a few minutes. When stir-frying or sautéing cabbage, this will take a little longer.
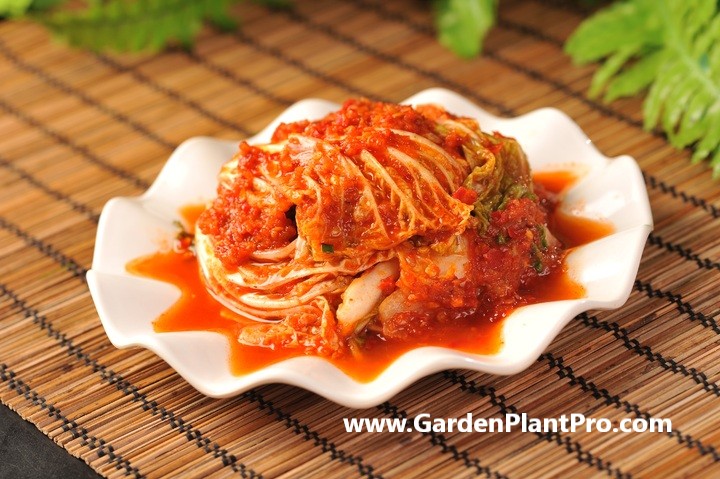
Cabbage can also be used to make a variety of dishes from around the world such as kimchi (Korean), soups (Irish), colcannon (Irish) and cabbage rolls (Eastern European). It makes a great addition to any dish and is incredibly nutritious. To get the most out of your cabbage dishes, try adding other vegetables such as carrots, onion or garlic for additional flavor.
Finally, don’t forget to save some of your cabbages for later!
Cabbage can be stored in a cool place for up to two weeks after harvest. Alternatively, you can pickle your cabbages or freeze them for use at a later date. With all these delicious uses for your homegrown cabbages, you’ll never have to go without.


