Watermelons are a delightful and refreshing summer treat, and nothing beats growing your own. Homegrown watermelons not only taste better than store-bought ones, but they are also a rewarding and enjoyable experience. However successfully growing watermelons takes some preparation and know-how to grow well.
In this guide we’ll walk you through the process of growing sweet and juicy watermelons in your own garden. Everything from selecting the correct kind and location to preparing the soil, planting, and caring for your watermelon plants will be covered. At the end you’ll have all the information you need to grow excellent watermelons that will wow your friends and family.
A Brief History
Watermelons are believed to have originated in Africa, where they have been cultivated for thousands of years. The first recorded watermelon harvest occurred in Egypt around 5,000 years ago, and they were also prized by the ancient Greeks and Romans.
In fact, the word “watermelon” first appeared in English dictionaries in the 16th century, and it is thought that the fruit was introduced to Europe by the Moors in the 13th century. Watermelons were brought to North America by European colonists, and they quickly became popular due to their sweet flavor and refreshing juice.
Today, watermelons are grown in almost every part of the world with warm, dry climates, and there are countless varieties available, each with its own unique flavor, texture, and appearance. From its humble beginnings in Africa, the watermelon has become one of the most beloved fruits in the world, enjoyed by millions of people every summer.
Nutritional Benefits
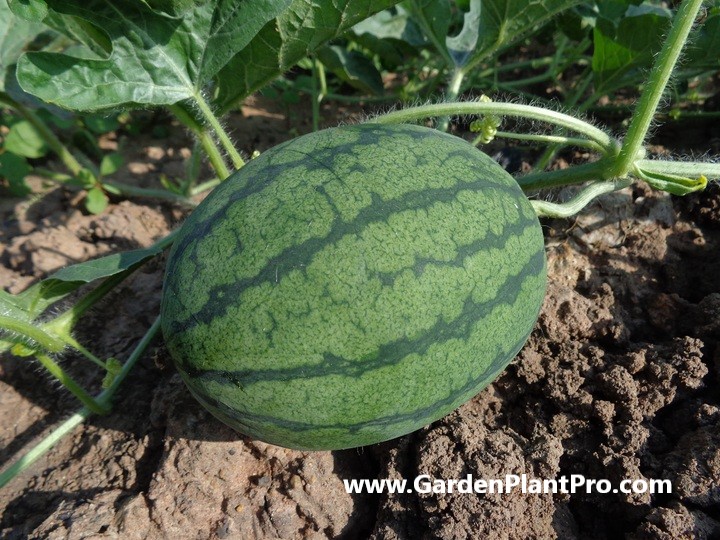
Watermelons are a hydrating and nutrient-rich fruit.
They contain 92% water and a range of minerals and vitamins. Watermelon seeds are also packed with nutrition, providing protein, carbohydrates, sugar, fiber, and fat.
Watermelons are an excellent source of vitamin A and vitamin C, as well as potassium and magnesium. Vitamin A is essential for healthy vision, while vitamin C boosts the immune system and helps to prevent cell damage. Potassium helps to regulate blood pressure, while magnesium plays a role in energy production.
Watermelon is also a great source of antioxidants, which can help protect your cells from damage caused by free radicals. It also contains lycopene, an antioxidant that is beneficial for heart health.
In addition to the nutritional benefits offered by watermelon itself, the fruit can be used in many ways. It can be blended into smoothies or made into juice and added to salads for a sweet and refreshing flavor. Watermelon can also be used in salsas and sauces to add a unique twist.
Common Varieties & Their Uses
When choosing which type of watermelon to grow, there are a few considerations to take into account. The three main types of watermelons are early season, mid-season and late-season.
Early season watermelons typically have thinner rinds and are ready to harvest in 60-70 days. Mid-season varieties have thicker rinds and take around 70-80 days to harvest, while late-season cultivars can take up to 85-95 days before they’re ready.
In addition to the type of watermelon, you should also consider the size of the fruit. For smaller spaces, look for bush varieties that produce melons that range in size from 3-6 pounds. For bigger gardens, heirloom varieties can yield fruits up to 20 pounds or more! There are also seedless varieties that don’t require the typical pollination process, so if you’re looking for no-hassle melons then these might be a great option.
When selecting your cultivar, it’s also important to consider flavor preferences. Choose from classic red or yellow flesh varieties for sweet and juicy melons, or opt for dark green rinded melons with orange or pink flesh for more interesting flavor combinations.
Finally, be sure to read up on reviews of the different types of watermelons before making your selection. Watermelon growing experts often provide valuable insight into growing conditions and yield information that can help you make an informed decision.
When To Sow
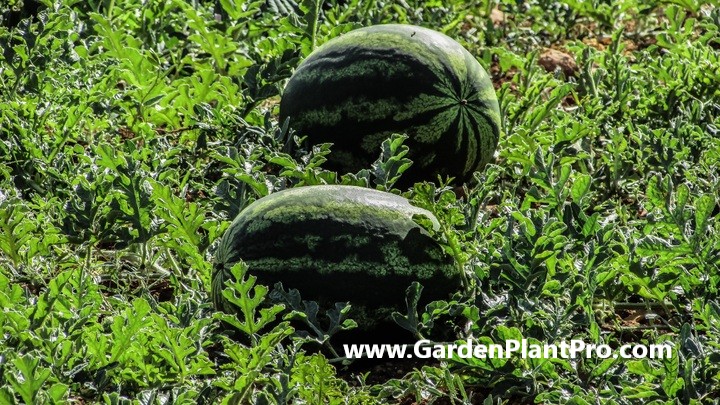
When it comes to sowing watermelon seeds, timing is essential. The ideal time to sow watermelon seeds is from late spring to early summer, or when the soil temperature reaches 70 degrees or above.
You can start seeds indoors around six weeks prior to your growing season. Plant the seeds 1/2 to 1 inch deep in seed-starting pots or directly into the ground, making sure to keep them evenly spaced. After two weeks, thin out the seedlings so that there are two plants per hill.
When planting watermelon seeds outdoors, use compost and fertilizer and form six to eight inch high raised beds with good drainage. Plant the seeds 1/2 to 1 inch deep in rows or hills spaced 6 feet apart and make sure you never let water collect around the stems as this will cause them to rot quickly.
Watermelon seedlings prefer soil temperatures from 21–35°C and need plenty of water and a humid environment in order for them to thrive. If your growing season is shorter, you can start your seeds indoors about 3-4 weeks prior to the last frost of the season. To allow for more root growth, use larger peat pots and plant the seeds 1 inch deep.
Choose Location & Prepare The Soil
When it comes to growing watermelons at home, choosing the right location and preparing the soil is key. Watermelon plants need a decent patch of land to set down roots, as well as a hot, sunny location with fertile, well-drained soil.
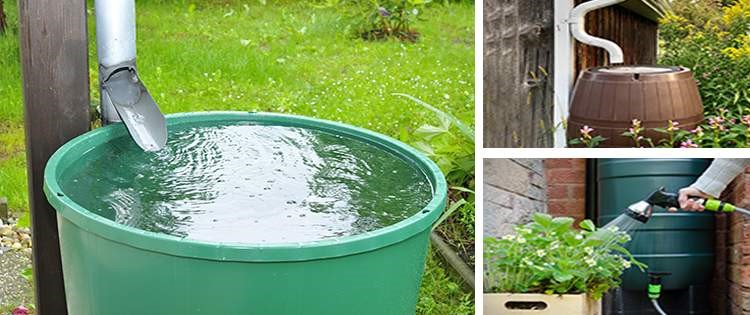
DIY PROJECT: Collect rainwater no matter where you live...
This DIY project is the best way to legally collect rainwater NO MATTER where you live. Get chlorine-free water, cut down on your water bills, and have enough for an emergency situation or to water your garden. Read More Here...
To ensure the best performance, gardeners should amend the soil with aged manure, seaweed, and/or compost before planting. Watermelons are heavy feeders, so they require nutrient-rich soil with plenty of organic matter to thrive.
For watermelon seeds to germinate, the soil should be a minimum of 60°F. If you can wait for your soil to heat up to the 70-95°F range, it will be even better for your watermelon plants. To cultivate delicious watermelons, gardeners should look for a site with full sun and good air circulation. A gentle sun-facing slope is ideal for growing watermelons.
Once you have chosen your location, you can start preparing the soil for planting. It is best to mix in plenty of organic matter such as aged manure or compost before sowing seeds or transplanting seedlings or cuttings. This will help create a nutrient-rich environment for your plants to thrive in. Additionally, it is important to make sure that the soil is well-drained so that your watermelons don’t rot in wet conditions.
Plant The Seeds, Seedlings Or Cuttings
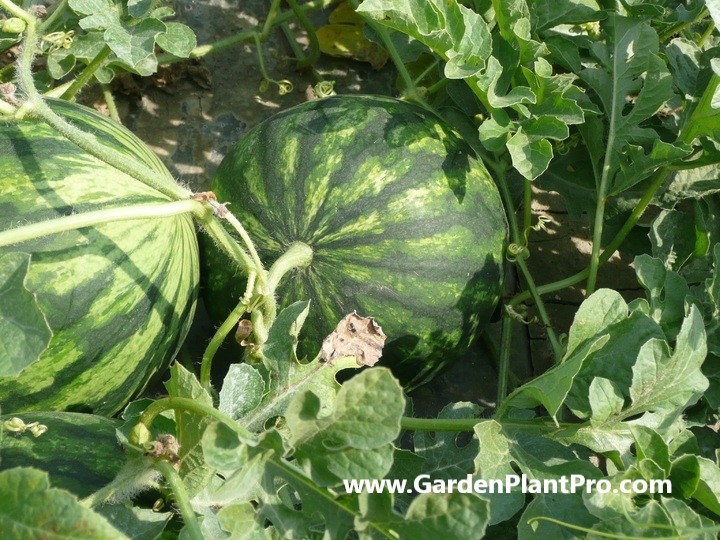
Once you have chosen a variety of watermelon and prepared the soil, you can begin planting the seeds, seedlings, or cuttings. Planting seeds is the most common method for growing watermelons.
Watermelon seeds require temperatures of 21-35°C for optimal germination rate. Plant the seeds ½ to 1 inch deep, placing two or three seeds in groups 18 to 24 inches apart. Once the seedlings are established, remove all but the strongest seedling from each group.
In cold climates, gardeners can jump-start their watermelon plants indoors prior to planting outside. In this case, insert one seed per pot at a depth of ½ inch into the soil and place in a warm spot with plenty of light.
When 3 or 4 true leaves (after the rounded seed leaves) appear, transplant outdoors into small hills with a spacing of 2-3 feet between plants. Transplant seedlings outdoors in spring after the chance of last frost has passed.
When planting cuttings, it is important to choose healthy stock with at least three nodes and avoid any that show signs of disease or wilting. Place cuttings in moist soil and cover with a thin layer of mulch to help retain moisture, then water well and keep them in a sunny spot until rooted.
Watering & Fertilizing
Watering and fertilizing are two important aspects of growing watermelons at home.
When fertilizing, use nitrogen-based fertilizer at the onset. Once the plant begins flowering, switch to a phosphorus-based fertilizer. Soil should be kept moist but not waterlogged; water at the vine’s base in the morning and avoid wetting the leaves and overhead watering.
Watermelon plants have deep roots that are good at extracting moisture from the soil, so until these roots are developed, water regularly. Watermelon needs one to two inches of water per week. To avoid splashing water and spreading disease, irrigate the base of plants with a watering wand or drip irrigation, rather than using a sprinkler or spraying them with a hose. Ensure that the soil is thoroughly soaked when watering. Gradually reduce watering as fruits ripen.
Before adding any compost or fertilizer, test your soil to know what nutrients you need and in what amounts. Choose a spot in the garden that has plenty of summer sunshine and room for your watermelon to spread. The soil should be enriched with compost and manure, and its pH should be between 6.0 and 7.0 for best growth. In the absence of a soil test, a complete fertilizer such as 10-10-10 or 13-13-13 can be used.
Maintenance
Maintaining your watermelons is essential for optimum yields. Watering is the most important factor to consider when caring for watermelons. The soil must be kept moist, but not waterlogged. Water at the vine’s base in the morning and avoid wetting the leaves or using overhead watering.
Fertilize your plants every two weeks, using a balanced fertilizer such as 10-10-10. Avoid fertilizers with too much nitrogen, as this can produce excessive foliage growth at the expense of fruit production. Weeds should be removed regularly and mulch should be used to help conserve moisture and keep weeds at bay. Monitor your plants for signs of disease or pests, and treat accordingly.
When & How To Harvest
When it comes to harvesting watermelons, timing is key.
A watermelon is ready to harvest when the bottom of the fruit turns from white or yellowish to a creamy yellow color. Additionally, the tendril nearest to the watermelon should have dried up and curled inward. It’s also important to note that the rind of the melon should be dull and hard, not shiny.
When harvesting, take care not to bruise or damage the melon. Use a sharp knife or pair of scissors to cut the stem off at the base of the watermelon, leaving about 2 inches of stem attached. Lift or roll the melon carefully and place it in a shallow container so as not to damage it. Watermelons will ripen further off of the vine, but this isn’t recommended as they won’t taste as sweet.
Do you have some charcoal in your house right now? We call charcoal a “miracle leftover” for anyone who wants to be a little more self-sufficient and cut costs. That’s because it can help you with so many different things around the house and garden. You can even use it to make an energy-free fridge. Read More Here...
It’s important to ensure that you don’t rush growth, as this can lead to an inferior product. You can use a soil thermometer to check that your soil temperature is optimal for growing watermelons (ideally around 65°F) and you can also check that your soil drainage is adequate by making sure that it doesn’t hold too much moisture for too long.
Additionally, when planting your watermelons it’s important to space them at least 3-5 feet apart so that they have enough room for adequate growth. Finally, when it comes time for fertilizing, use a balanced fertilizer such as 10-10-10 at least once during the growing season and make sure that you provide plenty of water during dry spells. By following these steps you can ensure that your watermelons are ripe and ready when they are harvested.
Storing & Preserving
Once the watermelons have been harvested, it is important to store and preserve them correctly to ensure they remain fresh and delicious. Whole watermelons can be stored uncut at room temperature in a cool, dark place for up to 10 days. However, if you wish to extend the shelf life of your watermelons, there are several methods you can employ.
One of the most effective ways of preserving watermelons is by juicing them. This will remove all of the natural sugars and make them last much longer. Alternatively, you can freeze your watermelon slices, cubes or puree for later use in smoothies, salads or cocktails.
If you don’t plan on using your watermelon immediately, it is best to refrigerate it. Place the whole fruit in the refrigerator for up to two weeks or cut slices and store them in an airtight container for up to four days. To maximize shelf life, you can also coat cut watermelon with a thin layer of lemon juice before storing it in the fridge.
Finally, you can also preserve your watermelon by making jams or jellies. Simply boil down the flesh and add sugar or pectin before transferring it into jars and sealing them shut. This will allow your watermelon preserves to last months if stored correctly in a cool, dry place away from direct sunlight and heat sources.
Common Diseases & How To Control Them
Watermelons are vulnerable to a variety of diseases, including bacterial and fungal diseases, viruses, and nematodes. Some of these diseases can be prevented or controlled with good cultural practices such as rotating crops, avoiding overhead irrigation and keeping the area clean and free of debris.
Bacterial Diseases
Bacterial diseases such as bacterial wilt and bacterial leaf spot can be a problem for watermelon plants. To control bacterial diseases, avoid overhead watering and use drip irrigation instead. Remove affected plants from the garden, disinfect your tools after use, and use resistant cultivars if possible.
Fungal Diseases
Common fungal diseases include powdery mildew, downy mildew, anthracnose, and fruit rot. Fungal infections can be prevented by using proper spacing to improve air circulation and reduce humidity levels. Avoid overhead irrigation, as this can increase the spread of fungal spores. Plant disease-resistant varieties when available, keep weeds under control to reduce humidity levels in the garden, and treat affected plants with fungicides if necessary.
Viruses
Watermelons are susceptible to several viruses such as cucumber mosaic virus (CMV) and watermelon mosaic virus (WMV). These viruses can spread quickly through infected seed or by insect vectors such as aphids or leafhoppers. Use disease-resistant varieties when available and control weeds to reduce insect populations in the garden. If viruses become a problem in your garden, contact your local extension office for advice on how to control them.
Common Pests & How To Control Them
Common pests can be a serious problem when growing watermelons, with certain insects and critters attracted to the sweet fruit or sap-sucking on the leaves. The most common pests that may afflict watermelon plants are aphids, beetles, slugs, and nematodes. To keep these pests from ruining your harvest, you can use various organic and chemical control methods.
Aphids
Aphids are small, soft-bodied insects that can suck the life out of your watermelon plants. They usually appear in colonies and can be controlled with insecticidal soap or neem oil applications. Spraying daily with a hose is also effective.
Beetles
Beetles are a major concern for watermelon growers and can cause serious damage to the leaves and fruit. The most common varieties of beetles include Japanese beetles, cucumber beetles, and squash bugs. To control these pests, use row covers over your plants or practice integrated pest management by spraying with insecticidal soap or neem oil as soon as you spot them.
Slugs
Slugs are a major problem for gardeners growing watermelons. These slimy creatures will eat the foliage and fruit of your plants if left unchecked. To control slugs, you can use baits such as beer traps or copper tape around the base of your plants. You can also handpick them at night or in the early morning hours when they are most active.
Nematodes
Nematodes are microscopic worms that feed on the roots of plants, causing stunted growth and wilting leaves. They cannot be seen with the naked eye but their presence is often indicated by wilting leaves and unhealthy looking plants. To prevent nematode infestations, practice crop rotation to avoid planting watermelons in soil that has been previously infected with nematodes and treat the soil with beneficial nematodes before planting your watermelon crop.
If you suspect that your plants are infected with nematodes, there are a few steps you can take to control the problem. One option is to plant marigolds, which produce a natural chemical that repels nematodes. You can also try solarizing your soil by covering it with clear plastic for several weeks in the hottest part of the year, which can kill off nematodes and other pests.
Other Tips & Tricks
When growing watermelons, there are a few extra tips and tricks to keep in mind.
CASE STUDY: We've been living off the grid for the last 40 years...
In all that time an electric wire has never been connected to our house. We haven’t gotten or paid an electricity bill in over 40 years, but we have all the electricity we want. We grow everything we need, here, in our small backyard. We also have a small medicinal garden for tough times. Read More Here...
Firstly, mulching around the plants is a great way to conserve moisture in the soil and keep weeds away.
Secondly, when the plants have grown to about 8 inches tall, top-dress with a nitrogen-rich fertilizer such as blood meal or fish emulsion. This will help promote healthy foliage and abundant fruits.
Thirdly, remove any weeds by hand or use a hoe to ensure that your watermelons receive enough nutrients for optimal growth. Finally, water your watermelons deeply when the soil is dry and allow it to dry out between watering sessions.
Companion planting is also beneficial for watermelon production. Planting marigolds around the perimeter of your melon patch can help ward off pests while planting corn or pole beans near the melons can provide shade and help hold in moisture. Other beneficial companion plants include radishes, squash and pumpkins.
It’s also important to monitor your watermelons’ progress closely throughout the growing season. If you spot any signs of disease or pests, take action immediately. Remove infected leaves or fruits and spray with an organic fungicide or insecticide if necessary. Keep an eye out for wilting leaves as this could indicate root rot, which may require changing soil pH levels with compost or lime if necessary.
Finally, make sure to harvest your melons when they are ripe by gently tugging on the stem near where it attaches to the fruit. If it comes away easily then it’s ready for harvesting!
Companion Planting
Companion planting is a great way to maximize the benefits from your watermelon crop. Certain plants can provide pest control and helpful nutrients to the soil, as well as increase pollination. Garlic, radishes, corn, broccoli, marigolds and certain herbs are all great companion plants for watermelons.
Garlic and onions or chives can help deter certain pests, while lettuces, marigolds, nasturtiums, and radishes all make good companion plants. Cucumbers, squash, and potatoes should be avoided when pairing other plants with watermelons.
Cosmos, coneflowers, coreopsis, marigolds, nasturtiums and sunflowers are other good options as companion plants for watermelons. Herbs like thyme, oregano, basil and mint are also beneficial companions for melons.
When choosing a location for your garden bed it is important to note that watermelons need plenty of sunshine to yield well. Planting them near other crops will create competition for sunlight and space. It is important to keep a distance between watermelon rows and other crops so that pests cannot move easily from one plant to another.
When planting your companion plants it is best to sow them at the same time as your watermelon seeds or transplants. Make sure that the distance between companion plants is sufficient so that they can grow without competing for resources. Water the soil well before you sow any seeds or set any transplants in the ground.
Fertilizing your garden bed regularly will help support both the main crop of watermelon and its companion plants. Make sure you read fertilizer instructions carefully before using it in your garden bed as too much fertilizer can damage both your main crop and its companions.
Proper maintenance of both the main crop of watermelon and its companion plants is essential for a successful harvest. Regularly check for pests or diseases on both types of plants.

Using Your Harvest
Once your watermelons are ripe and ready for harvest, you’ll be eager to enjoy the fruits of your labor. To do so, you need to know how to correctly harvest and store your melons.
Harvesting should be done when the melon is fully mature. To test for ripeness, examine the color of the rind and feel for a slight give when pressing against it. The area where the stem connects to the melon should also have started to turn yellow or brown. If you’ve grown a seeded variety, the seeds inside should be dark and fully developed when harvested.
It’s important to use caution when harvesting watermelons as they can easily bruise or crack if handled too roughly. To avoid this, use a pair of garden shears or sharpened knife to cut off the fruit close to the vine. You can also gently twist the melon until it detaches from the vine if it has not yet been cut away.
Once you’ve harvested your watermelons, you can store them in a cool, dry place for up to two weeks. Be sure to inspect them regularly for any signs of spoilage such as discoloration or soft spots. If you want your watermelon to last longer than two weeks, consider cutting it into slices and storing in an airtight container in the refrigerator for up to a week.
In addition to eating fresh watermelon, there are many other ways you can use your harvest. Watermelon can be juiced, pickled, frozen into ice cubes or blended into smoothies and sorbets. It can also be used in salads and salsas to add flavor and texture. You can even use it as an ingredient in savory dishes such as curries and stews!


